Cathedral PDF refers to digital documents exploring themes of literature, architecture, and cultural heritage․ These files offer insights into Raymond Carver’s “Cathedral” and historical cathedral designs, making them invaluable resources for scholars and enthusiasts alike․
1․1 Overview of the Cathedral PDF
Cathedral PDFs encompass a wide range of digital resources, including literary works like Raymond Carver’s Cathedral, architectural blueprints, and historical documents․ These files provide in-depth analyses of cathedrals, exploring their cultural, historical, and artistic significance․ From the emotional depth of Carver’s story to the intricate designs of Gothic cathedrals, Cathedral PDFs offer a comprehensive understanding of their subjects․ They often include high-quality images, detailed diagrams, and scholarly articles, making them invaluable for researchers, students, and enthusiasts․ Available in various formats, these PDFs ensure accessibility and convenience for those seeking knowledge about cathedrals in literature, architecture, and beyond․
1․2 Importance of the Cathedral PDF in Literature and Architecture
Cathedral PDFs hold significant importance in both literature and architecture, serving as a bridge between artistic expression and historical preservation․ In literature, they provide access to works like Raymond Carver’s Cathedral, offering insights into themes of human connection and emotional depth․ These files often include critical analyses and scholarly interpretations, making them invaluable for academic study․ In architecture, Cathedral PDFs showcase detailed designs, historical restorations, and cultural influences, aiding architects and historians in understanding and preserving these structures․ By digitizing these resources, Cathedral PDFs ensure that literary and architectural heritage is accessible and enduring for future generations, fostering education and appreciation across disciplines․
Literary Analysis of Raymond Carver’s Cathedral
Raymond Carver’s Cathedral explores themes of human connection, emotional blindness, and transcendence through its narrative․ The story delves into the complexities of relationships and personal growth, offering profound insights into the human condition․
2․1 Plot Summary of Cathedral by Raymond Carver
Cathedral by Raymond Carver revolves around a narrator’s encounter with Robert, a blind friend of his wife; The narrator’s initial reluctance transforms into a profound connection as Robert’s visit unfolds․ The story begins with the narrator’s skepticism about hosting Robert, whose wife has recently passed away․ During the visit, the narrator learns about Robert’s relationship with his wife, who had once worked for him․ Through a series of interactions, including a poignant moment where Robert draws a cathedral with the narrator, the story explores themes of understanding, empathy, and the bridging of emotional gaps․ The narrative is a powerful exploration of human connection and the transformative power of shared experiences․
2․2 Themes in Cathedral: Friendship, Loss, and Human Connection
Raymond Carver’s Cathedral delves into universal themes of friendship, loss, and human connection․ The story highlights the unlikely friendship between the narrator and Robert, a blind man, which evolves from initial discomfort to mutual understanding․ Loss is a pervasive theme, as Robert copes with the death of his wife, while the narrator confronts his own emotional detachment․ The narrative underscores the power of human connection, as the act of drawing a cathedral together symbolizes the bridging of gaps between individuals․ These themes are intertwined to create a profound exploration of empathy, vulnerability, and the transformative potential of shared experiences, resonating deeply with readers․
2․3 Character Analysis: The Blind Man and His Influence
The blind man, Robert, is a pivotal character in Cathedral, embodying wisdom and emotional depth despite his physical limitations․ His presence challenges the narrator’s superficial worldview, fostering a journey of self-discovery․ Robert’s calm demeanor and genuine empathy contrast sharply with the narrator’s initial cynicism, creating a dynamic that evolves throughout the story․ His influence extends beyond his visit, as he helps the narrator confront his emotional detachment and reconnect with his wife․ Through Robert’s character, Carver illustrates the transformative power of human connection and the idea that true vision transcends physical sight, leaving a lasting impact on both the narrator and the reader․
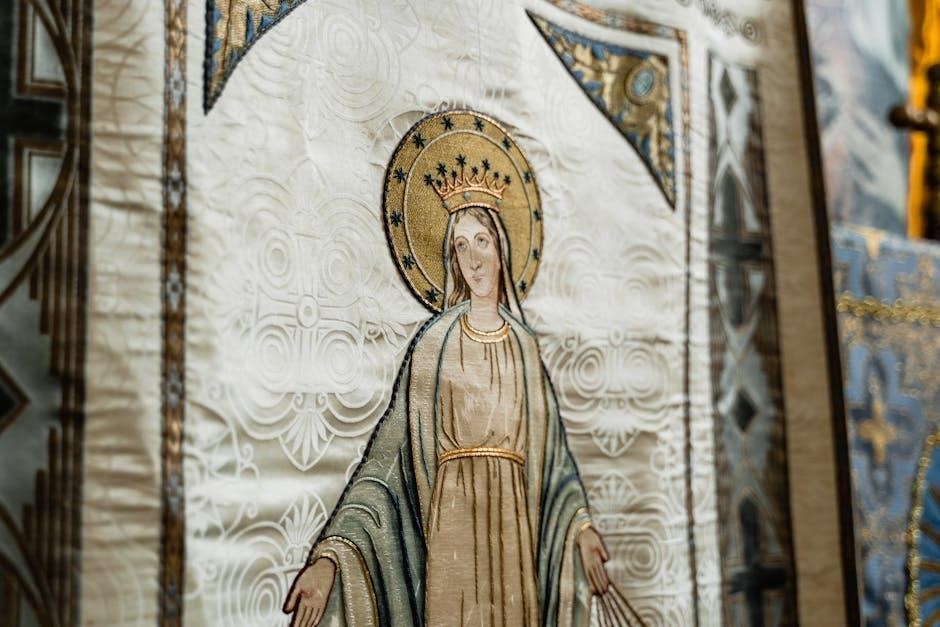
2․4 Symbolism in Cathedral: The Role of the Cathedral Itself
The cathedral in Raymond Carver’s story serves as a powerful symbol of spiritual connection and transcendence․ Though the physical cathedral is absent, its presence is felt through the shared experience of the narrator and Robert․ The act of drawing the cathedral together becomes a metaphor for unity and understanding, bridging the gap between sight and insight․ The cathedral represents the possibility of transcendence, even in the face of physical or emotional limitations․ It embodies the idea that true connection and enlightenment can emerge from unexpected places, highlighting the transformative power of human interaction and the enduring significance of art as a medium for expression and understanding․

Architectural Significance of Cathedrals
Cathedrals are renowned for their grandeur and intricate designs, reflecting engineering prowess and artistic mastery․ They serve as cultural and spiritual landmarks, captivating audiences worldwide with their timeless beauty․
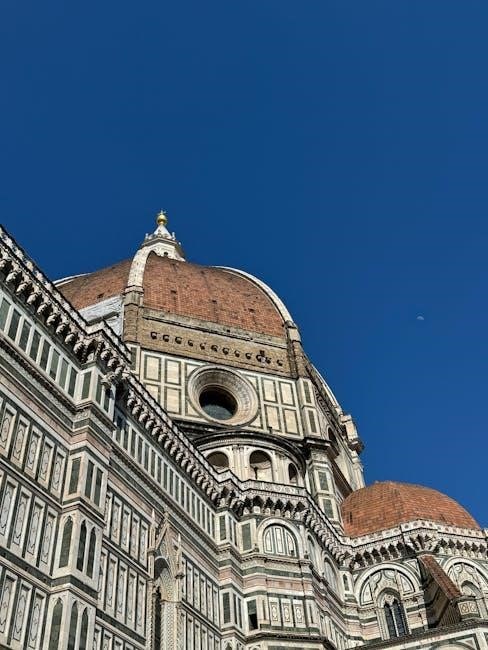
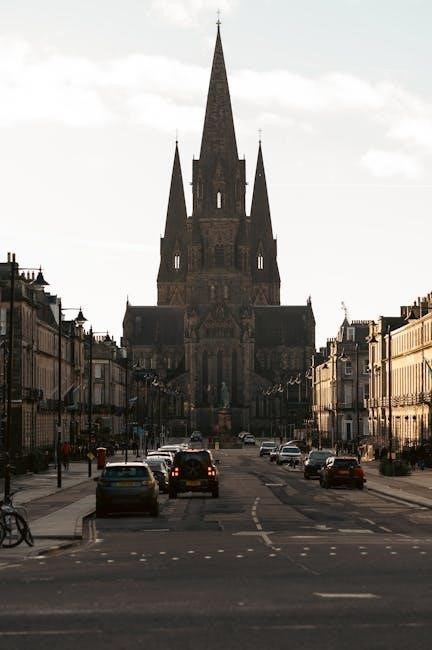
3․1 Gothic Cathedral Architecture: Key Features
Gothic cathedral architecture is characterized by its striking verticality and intricate details․ Key features include pointed arches, ribbed vaults, and flying buttresses, which allow for taller, more complex structures․ Stained glass windows are central, flooding interiors with colorful light and narrative imagery․ The use of slender columns and piers distributes weight efficiently, while the overall design emphasizes a sense of spiritual ascension․ These elements combine to create a harmonious blend of engineering innovation and artistic expression, defining the Gothic style․ The grandeur and intricacy of Gothic cathedrals continue to inspire awe and admiration, making them iconic landmarks in architectural history․
3․2 Historical Restoration of Cathedrals: Challenges and Techniques
Restoring cathedrals presents significant challenges, including preserving historical integrity while addressing structural decay․ Techniques involve meticulous research to ensure authenticity, using traditional materials like stone and wood․ Advanced methods, such as 3D scanning, aid in precise repairs․ Weathering, pollution, and age-related deterioration are common issues․ Specialists employ reversible techniques to maintain original craftsmanship, balancing conservation with modern safety standards․ Collaboration between architects, historians, and artisans is essential to uphold the cultural and religious significance of these landmarks․ Each restoration project is a delicate balance of art and science, ensuring cathedrals endure for future generations․
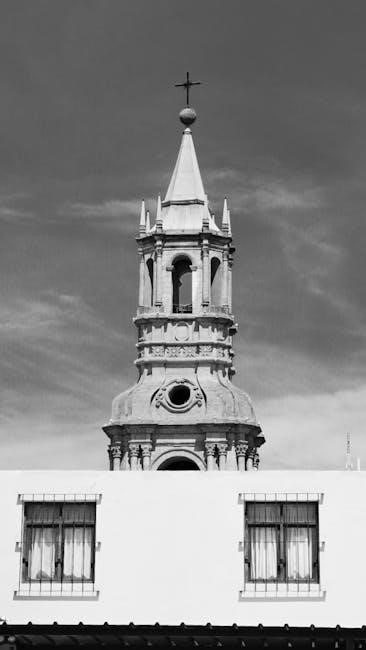
3․3 Cultural Impact of Cathedrals in Modern Society
Cathedrals remain vibrant cultural landmarks, inspiring awe and reflection in modern society․ They serve as symbols of historical heritage, attracting tourists and pilgrims worldwide․ Beyond religious significance, cathedrals host concerts, exhibitions, and community events, fostering social cohesion․ Their architectural grandeur influences contemporary design, while their historical narratives educate future generations․ PDF resources on cathedrals, such as those detailing their restoration and cultural roles, have made their significance more accessible․ These structures bridge the past and present, embodying enduring cultural and spiritual values that continue to resonate in today’s diverse societies․
PDF Resources on Cathedrals
Cathedral PDFs offer diverse resources, including Raymond Carver’s “Cathedral,” architectural designs, and historical documents․ These files are accessible online, providing rich insights for literature and architecture enthusiasts․
4․1 Free PDF Downloads of Raymond Carver’s Cathedral
Raymond Carver’s “Cathedral” is widely available as free PDF downloads online․ These digital versions provide easy access to the story, allowing readers to explore themes of friendship, loss, and human connection․ The PDF format ensures that the text is preserved in its original form, maintaining the author’s intent․ Many platforms offer these downloads, catering to students, researchers, and literature enthusiasts․ Additionally, the story is often included in collections of Carver’s works, making it a convenient resource for those interested in his literary contributions․ The availability of “Cathedral” in PDF has facilitated its study and appreciation across various academic and personal settings․
4․2 Architectural Plans and Designs of Cathedrals in PDF Format
Architectural plans and designs of cathedrals in PDF format provide detailed insights into the structural and aesthetic elements of these historic buildings․ These documents often include blueprints, cross-sections, and 3D models, showcasing intricate Gothic features such as vaulted ceilings, stained glass windows, and flying buttresses․ PDFs on cathedral architecture are valuable resources for architects, historians, and enthusiasts, offering a comprehensive understanding of construction techniques and cultural influences․ Many historical cathedrals, like Notre-Dame or Chartres, have their designs and restoration plans available online․ These files are essential for preserving architectural heritage and inspiring new designs․ They also serve as educational tools for studying the evolution of cathedral architecture over centuries․
4․3 Historical Documents and Research Papers on Cathedrals
Historical documents and research papers on cathedrals provide in-depth insights into their cultural, religious, and architectural significance․ These PDF resources often include restoration reports, academic studies, and archival records, offering a glimpse into the history of iconic cathedrals like Notre-Dame or Chartres․ Scholars and historians use these documents to analyze architectural evolution, historical events, and the societal impact of cathedrals․ For instance, papers on the restoration of Russian Orthodox cathedrals or the influence of Gothic architecture in Alsace are widely available․ These resources are invaluable for understanding the preservation efforts and historical contexts surrounding these structures, making them essential for researchers and enthusiasts alike․
The Role of PDFs in Preserving Cathedral-Related Content
PDFs play a crucial role in preserving cathedral-related content by providing accessible, high-quality, and durable digital formats for historical documents, architectural plans, and literary works․
5․1 Advantages of PDFs for Sharing and Storing Cathedral Information
PDFs offer unparalleled versatility and accessibility for sharing and storing cathedral-related content․ Their universal compatibility ensures that texts, images, and architectural designs remain intact across devices․ PDFs preserve high-quality visuals, making them ideal for showcasing intricate cathedral details․ Additionally, their ability to embed multimedia enhances user engagement, while password protection safeguards sensitive information․ The format’s reliability and consistency make it a preferred choice for academic and creative purposes, ensuring that historical and contemporary cathedral data is readily accessible and well-preserved for future generations․
5․2 Examples of Cathedral PDFs Available Online
Various cathedral-related PDFs are accessible online, catering to diverse interests․ Literary enthusiasts can download Raymond Carver’s Cathedral story in PDF format, exploring themes of human connection․ Architecture buffs can access detailed cathedral plans, such as Gothic designs or historical restoration documents․ Additionally, cultural and historical PDFs, like studies on Washington National Cathedral or Russian Orthodox cathedrals, provide insights into their significance․ These resources are readily available for free or through academic platforms, ensuring widespread accessibility for research and personal enrichment․
Cathedral PDFs are invaluable resources, bridging literature and architecture․ They offer insights into Raymond Carver’s work and historical cathedral designs, preserving knowledge and fostering appreciation globally․
6․1 Summary of Key Points About Cathedral PDFs
Cathedral PDFs encompass a wide range of content, from Raymond Carver’s literary masterpiece to detailed architectural designs․ These digital documents provide accessible and convenient access to historical, cultural, and literary insights․ They serve as essential resources for scholars, students, and enthusiasts, offering a comprehensive understanding of cathedrals’ significance in literature and architecture․ The PDF format ensures high-quality preservation of texts, images, and designs, making them ideal for research and education․ By bridging the gap between literature and architecture, Cathedral PDFs highlight the enduring cultural and historical importance of cathedrals, ensuring their legacy endures for future generations․
6․2 Final Thoughts on the Significance of Cathedral PDFs
Cathedral PDFs hold immense significance as they bridge literature and architecture, preserving cultural and historical heritage․ They offer unparalleled accessibility to Raymond Carver’s “Cathedral” and architectural designs, fostering education and research․ The PDF format ensures high-quality content, making these documents indispensable for scholars and enthusiasts․ By providing a centralized resource, Cathedral PDFs ensure the legacy of cathedrals endures, inspiring future generations to appreciate their literary and architectural importance․ Their convenience and accessibility make them a vital tool in modern academic and cultural discourse, ensuring the timeless appeal of cathedrals remains relevant in the digital age․