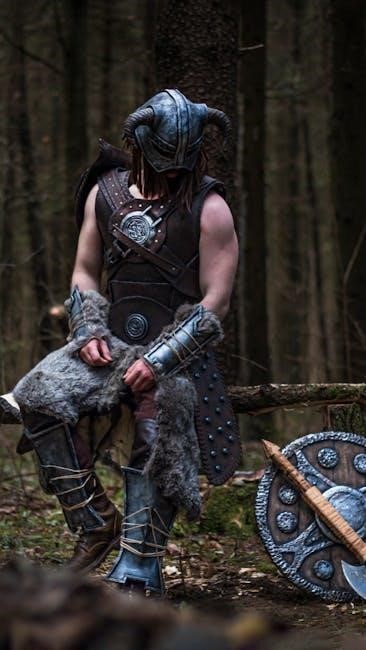
Category: Guide Page 1 of 3

the hangover parents guide

This guide provides an overview of The Hangover movie, focusing on its mature content, humor, and themes, helping parents make informed decisions about its suitability for younger audiences.

Movie Rating and Classification

The Hangover is rated R by the MPAA for pervasive language, sexual content including nudity, and drug material, making it unsuitable for younger audiences due to its mature themes and explicit content.

2.1 MPAA Rating: R for Pervasive Language, Sexual Content, and Drug Material

The film received an R rating from the MPAA due to its explicit content, including pervasive language, sexual references, and drug-related material. The language is coarse, with frequent use of profanity, and the sexual content includes nudity and crude humor. Drug and alcohol use are central to the plot, depicting characters engaging in excessive drinking and substance abuse, often leading to comedic but irresponsible situations. While the humor is intended to be entertaining, the themes and depictions are clearly mature, making the film unsuitable for younger audiences. Parents should be aware of these elements when deciding whether the movie is appropriate for their teens. The R rating underscores the need for parental discretion, as the content aligns with adult themes and behaviors.

2.2 Sexual Content: Nudity and Crude References

The Hangover contains explicit sexual content, including scenes of nudity and graphic references. These elements are central to the film’s humor but may be offensive or inappropriate for younger viewers. The movie features moments where characters encounter situations involving strip clubs, prostitutes, and explicit sexual jokes. A transsexual character is also depicted in a controversial manner, adding to the film’s mature themes. Parents should be particularly cautious, as the sexual content is not subtle and is often used for comedic effect. While the film’s intent is to entertain, the explicit nature of these scenes makes it unsuitable for children and younger teens. The presence of such content reinforces the R rating and highlights the need for parental discretion when allowing minors to watch the film.

2.3 Language and Profanity: Severe Use of Curse Words

The language in The Hangover is marked by excessive and severe profanity, with characters frequently using strong curse words. The film includes various explicit terms, such as the F-word, slurs, and other offensive language, often delivered in a casual or humorous context. This pervasive use of profanity contributes to the movie’s R rating and underscores its mature nature. Parents should note that the dialogue is not suitable for younger audiences, as it contains numerous instances of vulgar and inappropriate speech. The film’s reliance on such language adds to its edgy tone but also makes it unsuitable for children. The severity and frequency of the profanity emphasize the need for parental discretion, reinforcing the recommendation that the movie is intended for mature viewers only.

2.4 Drug and Alcohol Use: Portrayal and Consequences

The Hangover heavily features drug and alcohol use, which drives the plot and humor. Characters engage in excessive drinking and drug consumption, leading to chaotic and unpredictable situations. The film portrays the aftermath of a night of heavy partying, including memory loss, health risks, and legal consequences. While the movie uses humor to depict these events, it also shows the negative repercussions of irresponsible behavior. The MPAA rated the film R, in part, due to its drug material and alcohol use, emphasizing the mature nature of the content. Parents should be aware that the movie does not shy away from explicit scenes involving substance abuse, which may not align with all family values. The portrayal serves as a cautionary tale but is still likely to raise concerns for parents considering the film’s suitability for younger audiences.

Content Warnings for Parents

The Hangover contains explicit sexual content, strong language, and frequent drug and alcohol use, making it unsuitable for younger audiences. Parents should be cautious due to its mature and provocative nature.

3.1 Violence and Gore: Mild but Comedic

While The Hangover includes comedic violence, such as slapstick humor and chaotic situations, it avoids graphic gore. These scenes are intended for laughs rather than shock, making them less intense but still not suitable for young children. Parents should note that the humor often involves physical mishaps and exaggerated reactions, which, while not bloody, may still be inappropriate for sensitive or younger viewers. The film’s comedic approach to violence ensures it doesn’t cross into horror or extreme brutality, but it remains a consideration for those evaluating its appropriateness for minors.

3.2 Nudity and Sexual References: Explicit Scenes

The Hangover contains explicit nudity and sexual references that are central to its comedic yet raunchy narrative. Scenes include a transsexual woman exposing her breasts and male genitals, as well as suggestive dialogue and crude jokes. These elements are intended for mature audiences and may be offensive or inappropriate for younger viewers. The film’s humor often relies on sexual innuendos, explicit content, and provocative situations, which are not suitable for children. Parents should be aware that the movie’s portrayal of sexuality is overt and unfiltered, making it essential to exercise discretion when deciding whether to allow teens to watch. The combination of nudity and sexual humor adds to the film’s adult-oriented themes, reinforcing its R rating and the need for parental guidance.

3.3 Alcohol and Drug-Related Humor: Mature Themes

The Hangover heavily incorporates alcohol and drug-related humor, often depicting excessive drinking and substance use as central plot devices. These scenes are portrayed comedically but involve reckless behavior, such as blackouts, memory loss, and chaotic aftermaths. While the humor is intended to entertain, it normalizes irresponsible drinking and drug use, which could be problematic for impressionable audiences. Parents should note that the film glorifies these actions without fully exploring their negative consequences, potentially sending mixed messages to younger viewers. The movie’s reliance on alcohol-fueled antics underscores its mature themes and reinforces the need for parental discretion. The comedic approach to substance use may desensitize teens to the risks associated with such behavior, making it crucial for parents to discuss the real-life implications with their children before or after viewing the film.

Suitability for Children

The Hangover is rated R and contains mature content, making it unsuitable for children. Parents should exercise discretion due to pervasive language, sexual content, and drug material, ensuring it’s viewed by mature audiences only.

4.1 Age Recommendations: Mature Audiences Only

The Hangover is explicitly designed for mature audiences due to its explicit content. The MPAA has rated the film R for pervasive language, sexual content, and drug material, making it unsuitable for children. While the humor is comedic, the themes and scenes involve excessive drinking, nudity, and crude references, which are not appropriate for younger viewers. Parental discretion is strongly advised, and the film is recommended for viewers aged 17 and older. The mature themes and content require a level of emotional and cognitive maturity to fully understand and contextualize the film’s intent. Parents should carefully consider their child’s readiness to handle such material before allowing them to watch it. The film’s raunchy humor and adult-oriented storyline make it a choice best suited for adults or older teens with parental guidance.

4.2 Guidance for Mature Themes: Parental Discretion Advised

Given its explicit content, The Hangover requires careful consideration by parents before allowing teens to watch. The film’s humor, though comedic, is intertwined with mature themes such as excessive alcohol consumption, drug use, and sexual references. These elements are central to the plot, making it crucial for parents to assess their child’s maturity level. While the movie is entertaining, its raunchy and hedonistic portrayal of adult behavior may not align with all family values. Parents are advised to preview the film or discuss its content with their teens to ensure they understand the differences between reel and real-life consequences. Open dialogue can help teens critically analyze the film’s messages and make informed decisions about their own behavior. Supervision and guidance are essential to navigate the film’s mature themes effectively.

Themes and Messages in The Hangover

The Hangover explores themes of friendship, consequences of reckless behavior, and moral ambiguity, offering a mix of humor and reflection on hedonistic lifestyles, making it a film that sparks conversation about life choices.

5.1 Friendship and Camaraderie: The Core of the Story

At its heart, The Hangover revolves around the unbreakable bonds of friendship and camaraderie among its characters. The film portrays how a group of friends, despite their differences, come together to navigate a chaotic situation. Their shared misadventures highlight the strength of their relationships, showcasing loyalty and trust even in the most absurd circumstances. The movie uses humor to underscore the importance of standing by one another, no matter how dire the consequences. While the narrative is comedic, it ultimately emphasizes the value of friendship as a guiding force. For parents, this theme provides an opportunity to discuss with teens the importance of loyalty and how true friends support each other through thick and thin. The film balances raunchy humor with heartfelt moments, making it a relatable exploration of male camaraderie and the power of unity in overcoming life’s challenges.

5.2 Consequences of Irresponsible Behavior: Lessons Learned

The Hangover serves as a stark reminder of the consequences of irresponsible behavior, particularly in its portrayal of a wild night in Las Vegas. The characters’ reckless decisions lead to a series of chaotic and embarrassing events, highlighting the potential fallout of unchecked indulgence. While the film uses humor to narrate these misadventures, it also subtly underscores the importance of accountability. The characters must confront the aftermath of their actions, including physical discomfort, damaged relationships, and legal repercussions. These scenes provide a clear lesson about the importance of self-control and the potential long-term effects of impulsive choices. Parents can use this as a starting point to discuss with teens the real-life consequences of irresponsible behavior, emphasizing how poor decisions can impact one’s life and the lives of others. The film’s over-the-top scenarios make it an engaging way to spark conversations about personal responsibility and the importance of thinking before acting.

5.3 Moral Ambiguity and Ethics: A Hedonistic Worldview

The Hangover delves into themes of moral ambiguity, presenting a hedonistic worldview that often prioritizes immediate gratification over ethical considerations. The film’s characters engage in reckless behavior, blurring the lines between right and wrong. While the humor downplays the severity of their actions, the narrative subtly critiques the consequences of such a lifestyle. The character of Alan, for instance, embodies a morally questionable perspective, often disregarding societal norms for personal amusement. This portrayal challenges viewers to reflect on the ethical implications of their choices. Parents can use this as an opportunity to discuss with teens the importance of ethical decision-making and the potential impact of hedonistic behavior on personal and societal levels. The film’s approach to morality serves as a catalyst for conversations about responsibility, self-awareness, and the broader implications of one’s actions in a morally ambiguous world.

A Parents Guide to Discussing The Hangover with Teens

Encourage open conversations about the film’s humor, mature themes, and consequences of reckless behavior. Use it as a tool to discuss responsibility, ethics, and the importance of making informed decisions.

6.1 Talking About Consequences: Real vs. Reel Life

Discuss how the movie portrays the aftermath of a wild night, contrasting it with real-life repercussions. Highlight the importance of responsible behavior, emphasizing that real-life consequences can be severe and long-lasting, unlike the comedic resolution in the film. Use this opportunity to talk about the risks of excessive drinking, drug use, and poor decision-making. Encourage teens to think critically about the differences between fictional scenarios and real-world outcomes. Emphasize the value of making smart choices to avoid harmful situations. This conversation can serve as a gateway to broader discussions about accountability and the impact of one’s actions on themselves and others.

6.2 Encouraging Critical Thinking: Analyzing the Movie’s Messages

Engage your teens in a discussion about the movie’s themes, such as the consequences of reckless behavior, the importance of friendship, and the portrayal of alcohol and drug use. Ask open-ended questions to prompt critical thinking, like, “Do you think the movie accurately shows the effects of excessive drinking?” or “How do the characters’ actions impact their relationships?” Encourage them to consider the difference between the film’s comedic tone and the real-life repercussions of similar choices. Discuss how the movie’s messages align with your family’s values and beliefs. This can help teens develop a deeper understanding of the content and make more informed decisions in their own lives. Foster a dialogue that balances entertainment with real-world lessons, ensuring they can distinguish between fiction and reality. This approach can strengthen their ability to think critically about media and its influences.

Additional Resources for Parents

Visit movie review websites for detailed ratings and content analysis. Explore parenting guides and articles offering insights into navigating mature themes and discussions about films like The Hangover.

7.1 Movie Review Websites: Checking Ratings and Reviews

Movie review websites like IMDb, Rotten Tomatoes, and Common Sense Media provide detailed ratings and reviews for The Hangover. These platforms offer insights into the film’s content, including language, sexual references, and drug use. Parents can find specific breakdowns of scenes, such as nudity and comedic violence, to assess suitability. Additionally, these sites often include audience reviews and critic analyses, offering a balanced perspective on the movie’s themes; By checking these resources, parents can make informed decisions about whether the film aligns with their values and standards for their children. These tools are essential for understanding the mature content and humor in The Hangover, helping families navigate complex discussions about media consumption.

7.2 Parenting Guides and Articles: Navigating Mature Content

Parenting guides and articles offer valuable insights for navigating the mature content in The Hangover. Websites like Common Sense Media and Focus on the Family provide detailed analyses of the film’s themes, language, and sexual references. These resources help parents understand the context of the movie’s humor and its potential impact on younger audiences. Many articles discuss the importance of critical thinking when exposing teens to such content, emphasizing the need for open conversations about the consequences of irresponsible behavior. Additionally, these guides often include tips for setting boundaries and encouraging meaningful discussions about media consumption. By leveraging these resources, parents can better equip themselves to address the film’s mature themes and ensure their children grasp the differences between fictional portrayals and real-life consequences. These guides are indispensable for fostering a deeper understanding of The Hangover and its suitability for family viewing.

arborist study guide

Arboriculture involves the care and management of trees, focusing on their health, safety, and aesthetic value. Arborists play a vital role in maintaining urban and natural environments, ensuring trees thrive while posing minimal risk to people and property. This field combines science, technique, and environmental stewardship to promote sustainable tree care practices.

What is Arboriculture?

Arboriculture is the practice of cultivating and managing trees, focusing on their health, safety, and aesthetic value. It involves a holistic approach to tree care, blending scientific knowledge with practical techniques. Arborists, professionals in this field, work to ensure trees thrive while minimizing risks to people and property. Arboriculture is essential for maintaining urban and natural environments, promoting biodiversity, and enhancing ecosystem services. It encompasses activities like pruning, planting, diagnosing tree health, and assessing risks. The goal is to create sustainable, resilient tree populations that benefit both the environment and human well-being. Proper arboricultural practices ensure trees remain vibrant and safe for generations to come.

The Role of an Arborist

An arborist is a skilled professional responsible for the care and maintenance of trees. Their role includes planting, pruning, diagnosing tree health issues, and assessing risks to ensure safety. Arborists work in urban and natural environments, promoting tree health while minimizing hazards. They use specialized techniques and equipment to perform tasks like tree climbing, rigging, and surgery. Arborists also provide advice on tree selection, planting, and long-term care. Their expertise helps maintain the aesthetic and functional value of trees, contributing to environmental sustainability and public safety. By combining scientific knowledge with practical skills, arborists play a crucial role in preserving and enhancing tree populations for future generations.

Why Arboriculture is Important

Arboriculture is essential for maintaining the health, safety, and aesthetic value of trees in urban and natural environments. Trees provide oxygen, improve air quality, and support biodiversity, making their care critical for ecological balance. Arborists ensure trees remain healthy, reducing risks like branch failure and root decay. Their work enhances landscapes, promotes environmental sustainability, and supports community well-being. Proper tree management also protects property values and public safety, mitigating hazards during storms. By caring for trees, arborists contribute to a greener, healthier planet for future generations, emphasizing the importance of their role in preserving our natural heritage.

Essential Skills for an Arborist

Arboriculture is vital for preserving tree health, ensuring safety, and enhancing landscapes. It supports biodiversity, improves air quality, and mitigates climate change. Arborists protect property values, reduce storm risks, and promote environmental sustainability, benefiting both communities and ecosystems;

Tree Identification and Classification

Tree identification and classification are fundamental skills for arborists, enabling them to accurately recognize species and understand their characteristics. This knowledge aids in selecting appropriate care strategies, assessing risks, and managing tree health. Arborists use traits like leaf shape, bark texture, and flowering patterns to identify species. Classification systems, such as deciduous, evergreen, or coniferous, help categorize trees for targeted care. Understanding these distinctions ensures effective pruning, planting, and pest management. Additionally, recognizing native versus invasive species is crucial for ecological balance. Proper identification and classification are essential for developing accurate tree care plans and ensuring the longevity of urban and natural forests.

Pruning Techniques and Best Practices

Pruning is a critical skill in arboriculture, essential for maintaining tree health, safety, and aesthetics. Arborists prune to remove dead, diseased, or damaged branches, improve air circulation, and enhance structural integrity. Best practices include making clean, precise cuts just outside the branch collar to avoid damaging the tree. Over-pruning should be avoided, as it can stress the tree and lead to decay. Proper tools, such as sharp saws and loppers, are essential for effective pruning. Techniques vary depending on the tree species and objectives, such as crown reduction or hazard limb removal. Following established pruning guidelines ensures trees remain healthy and stable, while also minimizing risks to people and property.

Plant Health Care and Diagnosis

Plant health care and diagnosis are fundamental skills for arborists, focusing on identifying and managing tree health issues. Arborists assess tree conditions through visual inspections, laboratory tests, and monitoring for pests, diseases, or nutrient deficiencies. Early detection of problems like insect infestations or fungal infections is crucial for effective treatment. Diagnosis involves analyzing symptoms, such as leaf discoloration or canker formations, to determine the underlying cause. Treatment options may include targeted pruning, soil amendments, or pest control measures. A holistic approach considers environmental factors, soil conditions, and tree species to develop sustainable care plans. Regular monitoring ensures treatments are effective and helps prevent future issues, maintaining tree health and longevity.

Tools and Equipment for Arborists

Arborists rely on specialized tools and equipment to perform tree care tasks safely and effectively. This includes hand tools, climbing gear, and machinery designed for pruning, cutting, and lifting. Proper equipment is essential for maintaining tree health and ensuring worker safety and operational efficiency.

Hand Tools for Tree Care

Hand tools are indispensable for arborists, enabling precise tasks like pruning, cutting, and shaping. Pruning saws and loppers are used for trimming branches, while hand shears handle smaller cuts. Gloves protect hands during work. Aerial devices and rigging equipment assist in accessing high branches safely. Chippers and grinders process wood debris efficiently. These tools require regular maintenance to ensure optimal performance and longevity. Proper tool selection and maintenance are critical for effective tree care, ensuring both safety and the health of the trees. Arborists must be proficient in using these tools to achieve desired outcomes in various tree care scenarios.

Climbing Equipment and Safety Gear

Climbing equipment is essential for arborists to safely ascend and work in trees. Key components include ropes, harnesses, and carabiners, which provide secure anchorage and mobility. Safety gear like helmets and eye protection guard against falling debris. Climbing spikes and gaffs aid in ascending trunks, while descending devices control the descent. Proper equipment maintenance and inspection are crucial to ensure reliability. Arborists must be trained in the correct use of this gear to minimize risks. Regular checks and adherence to safety standards are vital for protecting both the arborist and the tree. This equipment enables efficient and safe tree care operations, even in challenging environments.

Power Equipment and Machinery

Power equipment and machinery are indispensable for arborists, enabling efficient tree care tasks. Chainsaws are essential for cutting branches and felling trees, while wood chippers process debris into manageable material. Stump grinders remove tree remnants, and aerial lifts provide access to high branches. Hydraulic tools, like log splitters, simplify heavy-duty tasks. Safety is paramount, with features like protective guards and emergency shut-offs. Regular maintenance ensures equipment longevity and reliability. Arborists must undergo training to operate these machines effectively and safely. Proper use of power equipment enhances productivity while minimizing risks, making it a cornerstone of modern arboriculture. Understanding these tools is vital for any aspiring or practicing arborist.

Certifications for Arborists

Certifications like ISA Certified Arborist and Tree Risk Assessment Qualification (TRAQ) demonstrate expertise in tree care and risk management, enhancing professional credibility and career advancement opportunities.

ISA Certified Arborist Program

The ISA Certified Arborist Program is a prestigious credential offered by the International Society of Arboriculture. It validates an arborist’s knowledge in tree care practices, safety protocols, and environmental stewardship. To obtain this certification, candidates must pass a rigorous exam that covers topics such as tree identification, pruning techniques, plant health care, and risk assessment. The program is designed to ensure that certified arborists meet high standards of professionalism and competence. Holding this certification not only enhances career opportunities but also signals to clients a commitment to excellence in arboriculture. Regular continuing education is required to maintain the certification, keeping arborists updated on the latest industry practices and research.

Tree Risk Assessment Qualification (TRAQ)

The Tree Risk Assessment Qualification (TRAQ) is a specialized certification offered by the International Society of Arboriculture (ISA). It focuses on evaluating tree hazards and structural stability to predict potential risks. Arborists with TRAQ certification are trained to identify defects, assess tree stability, and recommend mitigation strategies. The program includes both classroom instruction and field exercises to ensure practical application of risk assessment techniques. To earn the qualification, candidates must pass a written and practical exam, demonstrating their ability to accurately assess tree risks. TRAQ is essential for arborists involved in urban forestry, as it enhances their ability to protect people, property, and trees from potential hazards. This qualification is highly valued in the industry for improving safety and reducing liability.

Other Specialized Certifications

Beyond ISA and TRAQ, arborists can pursue specialized certifications to enhance their expertise. The Board Certified Master Arborist (BCMA) is an advanced credential requiring extensive experience and knowledge. Aerial Lift Certification ensures safe operation of equipment like bucket trucks. The Certified Tree Care Safety Professional (CTCSP) focuses on workplace safety, while the Certified Horticultural Technician (CHT) emphasizes plant care and nursery practices. These certifications demonstrate a commitment to excellence and expand career opportunities. They also allow arborists to specialize in areas like urban forestry, tree surgery, or ecosystem management. Continuous learning and professional growth are key to advancing in arboriculture, making these certifications invaluable for aspiring professionals.

Tree Risk Assessment and Management

Tree risk assessment and management involve evaluating tree stability, identifying hazards, and implementing strategies to mitigate risks, ensuring safety for people and property while preserving tree health.

Identifying Tree Hazards

Identifying tree hazards is critical for ensuring public safety and preventing property damage. Arborists assess factors like deadwood, cracks, decay, and root issues to determine potential risks. Structural defects, such as weak branch unions or cavities, indicate instability. Environmental factors, including extreme weather or pests, can exacerbate hazards. Proper identification involves visual inspections, diagnostic tools, and sometimes advanced techniques like sonic testing. Accurate assessment ensures timely interventions, such as pruning or removal, to mitigate risks effectively while preserving tree health and functionality. Regular monitoring is essential as tree conditions can change over time, especially in dynamic urban environments.

Assessing Tree Stability and Structure

Assessing tree stability and structure involves evaluating the physical condition and integrity of a tree to determine its safety and longevity. Arborists examine key factors such as trunk and branch strength, signs of decay or cracks, and root system health. Structural defects like weak branch unions or cavities can indicate instability. Environmental influences, such as wind exposure or soil conditions, also play a role. Advanced tools like resistograph testing may be used to detect internal decay. Accurate assessment helps identify potential failures, enabling proactive measures such as pruning or cabling to enhance stability and ensure the tree remains safe and healthy. Regular evaluations are essential for maintaining tree structure and preventing hazards.

Developing Risk Management Plans

Developing risk management plans is crucial for minimizing hazards associated with trees. Arborists identify potential risks, such as falling branches or unstable trees, and prioritize them based on severity and likelihood. Strategies may include pruning, cabling, or removing hazardous trees. Regular monitoring and maintenance are essential to ensure plans remain effective. Collaboration with stakeholders, like property owners, is key to implementing solutions. Documentation of assessments and actions taken is vital for accountability and future reference. Effective risk management balances tree preservation with safety, ensuring urban environments remain both beautiful and secure. Ongoing education and adaptation to new techniques enhance the quality of risk management plans, benefiting both arborists and the communities they serve.

Tree Biology and Physiology

Tree biology and physiology explore the structural and functional aspects of trees, including growth, development, and responses to environmental factors. Understanding these principles is essential for arborists to manage tree health effectively.

Understanding Tree Anatomy

Understanding tree anatomy is fundamental for arborists, as it helps identify and address structural issues. Trees are composed of roots, stems, branches, and leaves, each serving specific functions. The root system absorbs water and nutrients, while the stem transports these resources upward. Leaves are responsible for photosynthesis, producing energy for growth. The cambium layer, located between the bark and wood, generates new growth, enabling the tree to expand in diameter. Recognizing these components allows arborists to assess health, identify decay, and implement appropriate care strategies. This knowledge is crucial for pruning, diagnosing illnesses, and ensuring overall tree stability and longevity in various environments.

Tree Growth and Development

Tree growth and development are dynamic processes influenced by genetic and environmental factors. Trees begin as seeds, germinating into seedlings that develop root systems and shoots. As they mature, they form trunks, branches, and leaves, optimizing their structure for light capture and resource distribution. Growth rates vary among species, with some trees maturing quickly while others take decades. Environmental conditions like soil quality, water availability, and sunlight significantly impact growth patterns. Arborists study these processes to identify potential issues early, such as nutrient deficiencies or structural weaknesses. Understanding growth stages enables arborists to apply targeted care, ensuring trees reach their full potential while maintaining health and stability over time.

Factors Affecting Tree Health

Tree health is influenced by various environmental, biological, and human-induced factors. Environmental conditions such as soil quality, water availability, and climate play a crucial role in determining tree health. Poor soil nutrients, drought, or excessive moisture can weaken trees, making them vulnerable to pests and diseases. Biological factors include insect infestations, fungal infections, and competition from invasive species. Human activities, such as pollution, construction damage, and improper pruning, can also harm trees. Identifying these factors early allows arborists to implement corrective measures, such as pest control, soil amendments, or structural support. Regular monitoring and maintenance are essential to ensure trees remain healthy and thrive in their environments.

Safety Practices in Arboriculture

Safety is critical in arboriculture to minimize risks during tree care operations. Proper use of PPE, safe climbing techniques, and emergency preparedness are essential to protect arborists and others.

Personal Protective Equipment (PPE)

Personal Protective Equipment (PPE) is essential for arborists to ensure safety during tree care operations. A hard hat or climbing helmet protects the head from falling debris. Safety glasses or goggles prevent eye injuries, while ear protection reduces noise exposure from power tools. High-quality gloves improve grip and protect hands from cuts and abrasions. Chainsaw-resistant pants or chaps safeguard against cutting chains, and steel-toe boots provide foot protection. Climbing harnesses and ropes are critical for safe ascents and descents. Properly fitted PPE not only reduces injury risks but also enhances an arborist’s ability to perform tasks confidently. Regular inspection and maintenance of PPE are vital to ensure its effectiveness.

Safe Climbing and Rigging Techniques

Safe climbing and rigging techniques are critical for arborists to minimize risks during tree care operations. Proper climbing methods include using approved harnesses, ropes, and carabiners, while ensuring all equipment is inspected before use. Arborists must ascend carefully, maintaining three points of contact with the tree. Rigging involves securing branches or sections of the tree with ropes and pulleys to control their descent. Double-checking knots and equipment is essential to prevent accidents. Arborists should also be trained in emergency procedures, such as rescue techniques, in case of a fall or equipment failure. Adhering to industry standards and best practices ensures a safe working environment for both the arborist and bystanders.

Emergency Procedures and First Aid

Emergency procedures and first aid are essential skills for arborists to handle accidents effectively. Arborists often work at heights, making falls a significant risk. Immediate response to injuries, such as cuts, fractures, or head trauma, is crucial. First aid training should include wound cleaning, bleeding control, and splinting. In case of a fall, immobilizing the injured person and calling for professional medical help is vital. Arborists should also be trained in CPR and the use of first aid kits. Regular drills and certifications in emergency response ensure preparedness. Knowing how to assess injuries and stabilize the patient until help arrives can prevent further harm and save lives in critical situations.

Career Development for Arborists

Pursuing advanced certifications, engaging in workshops, and networking with professionals are key strategies for career growth in arboriculture, helping arborists stay updated on industry trends and techniques.

Education and Training Opportunities

Arborists can pursue various educational pathways, including ISA certification programs, online courses, and community college degrees in arboriculture or urban forestry. Many resources, like workshops and seminars, offer hands-on training in tree care techniques, ensuring arborists gain practical skills. Universities and professional organizations provide advanced courses in tree risk assessment and plant health care. Online platforms also offer flexible learning options, such as webinars and study guides, to help arborists prepare for certifications. Additionally, apprenticeships and mentorship programs allow beginners to learn from experienced professionals, blending theoretical knowledge with real-world application. Continuous education is crucial for staying updated on industry standards and best practices, supporting long-term career growth and expertise in arboriculture. Specialized programs, such as TRAQ, further enhance an arborist’s ability to assess and manage tree risks effectively. By leveraging these opportunities, arborists can build a strong foundation for their careers and contribute to the field’s advancement.

Building a Professional Network

Building a professional network is essential for arborists to share knowledge, gain insights, and stay updated on industry trends. Joining organizations like the International Society of Arboriculture (ISA) provides access to workshops, conferences, and online forums where professionals connect. Attending local tree care events and volunteering for community projects can also expand your network. Collaborating with experienced arborists and mentors offers valuable learning opportunities. Online platforms, such as specialized forums and social media groups, facilitate global connections and knowledge exchange. A strong professional network not only enhances career growth but also fosters innovation and problem-solving in arboriculture. Regular engagement with peers helps arborists stay informed about best practices and emerging techniques in tree care and management.

Advancing Your Career in Arboriculture

Advancing your career in arboriculture requires continuous learning and professional development. Pursuing specialized certifications, such as the ISA Certified Arborist or TRAQ, enhances credibility and opens doors to advanced roles. Engaging in workshops, seminars, and online courses keeps you updated on the latest techniques and technologies. Seeking mentorship from experienced arborists provides valuable guidance and industry insights. Additionally, staying active in professional organizations and participating in networking events can lead to new opportunities. Demonstrating leadership through community projects or educational initiatives further boosts your profile. By committing to lifelong learning and staying adaptable to industry changes, arborists can achieve long-term success and contribute meaningfully to the field of arboriculture. This dedication not only advances individual careers but also elevates the profession as a whole.

The arborist study guide emphasizes the importance of certifications, continuous learning, and ethical practices in promoting tree health and safety, guiding professionals toward a successful and impactful career.

Key Takeaways from the Study Guide

The arborist study guide highlights essential skills, certifications, and best practices for tree care professionals. It emphasizes the importance of proper tree identification, pruning techniques, and plant health care. The guide also underscores the role of certifications like ISA Certified Arborist and TRAQ for professional credibility. Additionally, it stresses the need for continuous learning to stay updated on industry standards and advancements. By mastering these key areas, arborists can ensure safe, effective, and sustainable tree management, ultimately contributing to the preservation of urban and natural environments for future generations. These takeaways provide a solid foundation for a successful and impactful career in arboriculture.

Continuous Learning and Professional Growth

Continuous learning is crucial for arborists to stay updated on industry advancements and best practices. Pursuing certifications like ISA Certified Arborist and TRAQ demonstrates commitment to professional excellence. Engaging in workshops, online courses, and seminars ensures arborists remain informed about new techniques and tools. Networking with other professionals through organizations like the International Society of Arboriculture fosters collaboration and knowledge sharing. Regularly reviewing study guides and participating in continuing education programs helps arborists refine their skills and adapt to emerging challenges in tree care. By prioritizing lifelong learning, arborists can advance their careers and contribute to the evolution of arboriculture as a profession.

hotpoint washing machine user guide

Welcome to the Hotpoint Washing Machine User Guide, your comprehensive resource for understanding and optimizing your appliance’s performance. This guide provides essential information on safe installation, operation, and maintenance, ensuring you get the most out of your machine’s features while prolonging its lifespan. Inside, you’ll find detailed instructions on eco-friendly cycles, troubleshooting, and advanced settings designed to enhance your laundry experience. Whether you’re a new user or looking to refine your skills, this guide is tailored to help you master your Hotpoint washing machine’s capabilities. Refer to it regularly for tips, safety precautions, and expert advice to keep your appliance running efficiently for years to come.

1.1 Understanding the Importance of the User Manual

The user manual is a crucial resource for understanding your Hotpoint washing machine’s features, proper usage, and maintenance. It provides step-by-step instructions for installation, operation, and troubleshooting, ensuring safe and efficient appliance use. By following the manual, you can maximize energy efficiency, extend the machine’s lifespan, and resolve common issues quickly. Whether you’re a new user or familiar with the appliance, the manual serves as a vital reference guide to help you make the most of your washing machine’s capabilities while adhering to safety and performance standards. Always keep it handy for optimal results.

1.2 Key Features of Hotpoint Washing Machines

Hotpoint washing machines are renowned for their innovative features designed to enhance laundry efficiency and user convenience. Key features include eco-friendly cycles like the Eco 40-60 program, which optimizes energy and water usage, and the advanced Inverter Motor for quieter and smoother operation. Multiple wash modes cater to various fabric types, ensuring delicate care for sensitive items and robust cleaning for heavily soiled loads. Additional highlights include child safety locks, anti-allergy cycles, and smart sensors that automatically adjust settings for optimal performance. These features make Hotpoint machines both practical and eco-conscious, offering a superior laundry experience for modern households.

Identifying Your Hotpoint Washing Machine Model

Locate the model number on the back or under the lid of your Hotpoint washing machine. This identifier is crucial for accessing the correct user manual and support resources.

2.1 Locating the Model Number on Your Machine

To identify your Hotpoint washing machine model, check the back or underside of the machine for a label displaying the model number. This number is essential for accessing the correct user manual and troubleshooting guides. Ensure the number is visible and legible, as it may be small or discreetly placed. If the label is worn, refer to the machine’s documentation or contact Hotpoint support for assistance. Knowing your model number ensures you receive accurate instructions tailored to your specific appliance.

2.2 Matching the Model Number to the User Manual

Once you’ve located the model number on your Hotpoint washing machine, visit the official Hotpoint website or authorized online platforms to find the corresponding user manual. Enter the model number in the search bar to access the correct guide. Ensure the manual matches your machine’s specific features and settings for accurate instructions. If unavailable online, contact Hotpoint customer support for assistance. Always use the correct manual to avoid confusion and ensure proper operation of your appliance. This step guarantees you have the right information for optimal performance.

Installation and Setup

Proper installation ensures optimal performance. Begin by unpacking and leveling the machine, then connect water and electricity supplies. Follow the manual for precise setup instructions.

3.1 Unpacking and Preparing the Machine

Unpacking your Hotpoint washing machine is the first step toward seamless operation. Carefully remove the appliance from its packaging, ensuring all protective covers and transit bolts are detached. Check for any visible damage and verify all accessories, such as the user manual and installation kit, are included. Before powering on, ensure the machine is placed on a stable, level surface to prevent vibration during use. This preparation ensures safety, proper function, and a smooth installation process; Always refer to the manual for specific unpacking instructions tailored to your model.

3.2 Leveling the Washing Machine for Proper Operation

Proper leveling is essential for your Hotpoint washing machine to function smoothly and prevent excessive vibration. Begin by placing the machine on a firm, even surface. Use the adjustable feet to ensure the appliance is perfectly balanced. Check the level by placing a spirit level on the top surface. If the machine isn’t level, adjust the feet accordingly until the bubble aligns centrally. This step ensures optimal performance, reduces noise, and prevents potential damage. Always refer to your user manual for specific leveling instructions tailored to your model.

3.3 Connecting Water and Electricity Supplies

Ensure your Hotpoint washing machine is properly connected to both water and electricity supplies for safe and efficient operation. Connect the water inlet hoses to the machine’s inlet valves and the water supply taps, making sure taps are fully open; Use the hoses provided to avoid compatibility issues. Plug the machine into a grounded electrical outlet, avoiding extension cords for safety. Double-check all connections for leaks and secureness. Refer to your user manual for specific instructions tailored to your model, ensuring compliance with safety standards and optimal performance.

Operating the Washing Machine

Start by selecting the appropriate wash mode for your load. Press the START/PAUSE button to begin the cycle. Monitor the progress through the display indicators.

4.1 Starting a Wash Cycle: Step-by-Step Instructions

Press the ON/OFF button to power on the machine.
Select the desired wash mode using the control panel.
Choose additional options like temperature or spin speed.
Ensure the water supply taps are fully open;
Press the START/PAUSE button to begin the cycle.
The machine will automatically fill with water and start washing.
Monitor the cycle progress via the display indicators.
Once complete, unload your laundry promptly for best results.

4.2 Selecting the Right Wash Mode for Your Load

Selecting the appropriate wash mode ensures optimal cleaning and fabric care. For delicate items, choose the Delicate cycle with low spin speed. Heavily soiled loads benefit from the Long Cotton or Intensive mode. Everyday laundry can be washed using the Eco 40-60 cycle, which balances energy efficiency and performance. Use the Quick Wash option for smaller loads needing rapid cleaning. Always match the cycle to the fabric type and soil level for best results. Refer to your user manual for model-specific modes tailored to your needs.

4.3 Understanding Wash Cycle Symbols and Indicators

Understanding the wash cycle symbols and indicators on your Hotpoint washing machine is crucial for optimal use. The control panel features icons representing cycle options like temperature settings, spin speed, and special modes. The Eco 40-60 symbol indicates energy-efficient washing at 40°C or 60°C. A tub symbol with waves signifies a gentle cycle for delicate fabrics. Look for indicators like a lock (child lock) or a spinning tub (active cycle). Refer to your user manual for a detailed guide to these symbols, ensuring you select the right cycle for your load and fabric type. This helps prevent damage and ensures efficient cleaning.

Maintenance and Cleaning

Regular maintenance ensures optimal performance and longevity. Clean the filter, drain hose, and run a cleaning cycle every 40 washes to remove residue and bacteria, as detailed in your user manual.

5.1 Cleaning the Filter and Drain Hose

Regular cleaning of the filter and drain hose is crucial for maintaining your Hotpoint washing machine’s performance. Locate the filter at the bottom of the machine and remove it by turning it counterclockwise. Rinse it thoroughly under running water to eliminate debris and lint. For the drain hose, ensure it is free from kinks and blockages. After cleaning, reinstall the filter and hose securely to prevent leaks. Refer to your user manual for specific instructions, as the process may vary slightly depending on your model. Regular maintenance helps prevent mold growth and ensures efficient drainage during wash cycles. By following these steps, you can keep your machine running smoothly and extend its lifespan. Always check for any additional recommendations in your manual to tailor maintenance to your model’s needs. This simple routine can significantly improve your machine’s efficiency and prevent potential issues down the line. Cleaning these parts every 1-2 months is ideal for optimal performance. Additionally, running a cleaning cycle every 40 washes, as suggested, helps remove internal residue and bacteria, further enhancing your machine’s functionality. Taking these steps ensures your Hotpoint washing machine continues to deliver excellent results and remains in great condition for years to come. Always prioritize regular maintenance to avoid costly repairs and ensure your machine operates at its best. By dedicating a few minutes to cleaning and checking these components, you can enjoy reliable performance and extend the life of your appliance. Remember, a well-maintained machine not only performs better but also contributes to energy efficiency and cost savings over time. Never overlook the importance of these simple maintenance tasks, as they play a vital role in the overall functionality and longevity of your Hotpoint washing machine. Always refer to your user manual for specific guidance tailored to your model to ensure you’re following the recommended procedures for cleaning and upkeep. This attention to detail will help you get the most out of your appliance and keep it running like new for a long time.

5.2 Running a Cleaning Cycle for Optimal Performance

To maintain your Hotpoint washing machine’s efficiency, run a cleaning cycle every 40 wash cycles. This process removes internal residue and bacteria, ensuring optimal performance. Press and hold the respective button for 5 seconds to activate the cycle. The machine will automatically run the cleaning program, improving hygiene and preventing odors. Regular cleaning cycles help maintain your machine’s internal health and ensure it continues to deliver excellent wash results. This simple step is essential for prolonging the lifespan of your appliance and keeping it in peak condition. Always refer to your user manual for specific instructions tailored to your model. By incorporating this routine, you can enjoy a cleaner, more efficient washing machine for years to come. Regular maintenance like this is key to avoiding issues and ensuring your Hotpoint washing machine operates at its best. Make it a habit to run the cleaning cycle as recommended to keep your appliance in top shape and maintain its performance. This dedication to maintenance will pay off in the long run, ensuring your machine remains reliable and effective. Always prioritize these cleaning cycles to get the most out of your Hotpoint washing machine and keep it running smoothly. By doing so, you’ll protect your investment and ensure your appliance continues to meet your laundry needs effortlessly. Remember, a clean machine is a efficient machine, and this cycle is a straightforward way to achieve that. Take the time to run it regularly and enjoy the benefits of a well-maintained Hotpoint washing machine. This simple step can make a significant difference in the performance and longevity of your appliance, so don’t overlook its importance. Always stay proactive with maintenance to keep your machine in the best possible condition. Running a cleaning cycle every 40 washes is a quick and easy way to ensure your Hotpoint washing machine remains clean, efficient, and ready to handle your laundry needs. Make it a part of your routine and reap the rewards of a machine that performs like new for years to come. This small effort will contribute significantly to the overall health and functionality of your appliance, ensuring it continues to serve you well. Always remember, regular cleaning cycles are a vital part of maintaining your Hotpoint washing machine’s optimal performance and longevity. By incorporating this into your maintenance routine, you’ll be able to enjoy a cleaner, more efficient appliance that meets all your expectations. Take the time to run the cleaning cycle as recommended and keep your machine in the best condition possible. This simple practice will help extend the life of your Hotpoint washing machine and ensure it continues to deliver outstanding results. Always prioritize this step to maintain the quality and performance of your appliance, and you’ll be rewarded with a machine that runs smoothly and efficiently for a long time. By staying on top of regular maintenance, you can prevent potential issues and keep your Hotpoint washing machine in excellent working order. Make running a cleaning cycle a regular part of your routine to ensure your appliance remains clean, efficient, and reliable. This dedication to maintenance will pay off in the long run, ensuring your machine continues to meet your needs and provide excellent service. Always remember, a well-maintained machine is a happy machine, and running a cleaning cycle every 40 washes is a key part of that process. Take the time to do it right and enjoy the benefits of a Hotpoint washing machine that performs at its best. This simple step is a crucial part of keeping your appliance in top shape, so don’t overlook its importance. Always stay proactive with maintenance and run the cleaning cycle as recommended to keep your machine running smoothly and efficiently. By doing so, you’ll be able to enjoy a cleaner, more reliable appliance that continues to deliver excellent results for years to come. This small effort will make a big difference in the performance and longevity of your Hotpoint washing machine, so make it a part of your regular routine. Always prioritize the health and efficiency of your appliance by running the cleaning cycle every 40 washes, and you’ll be rewarded with a machine that runs like new. This simple practice is essential for maintaining the quality and performance of your Hotpoint washing machine, so don’t forget to include it in your maintenance schedule. By staying on top of regular cleaning cycles, you can ensure your appliance remains in excellent condition and continues to meet all your laundry needs. Always remember, a clean machine is a efficient machine, and this cycle is a quick and easy way to achieve that. Take the time to run it regularly and enjoy the benefits of a well-maintained Hotpoint washing machine. This small step can make a significant difference in the performance and longevity of your appliance, so don’t overlook its importance. Always stay proactive with maintenance to keep your machine in the best possible condition. Running a cleaning cycle every 40 washes is a quick and easy way to ensure your Hotpoint washing machine remains clean, efficient, and ready to handle your laundry needs. Make it a part of your routine and reap the rewards of a machine that performs like new for years to come. This small effort will contribute significantly to the overall health and functionality of your appliance, ensuring it continues to serve you well. Always remember, regular cleaning cycles are a vital part of maintaining your Hotpoint washing machine’s optimal performance and longevity. By incorporating this into your maintenance routine, you’ll be able to enjoy a cleaner, more efficient appliance that meets all your expectations. Take the time to run the cleaning cycle as recommended and keep your machine in the best condition possible. This simple practice will help extend the life of your Hotpoint washing machine and ensure it continues to deliver outstanding results. Always prioritize this step to maintain the quality and performance of your appliance, and you’ll be rewarded with a machine that runs smoothly and efficiently for a long time. By staying on top of regular maintenance, you can prevent potential issues and keep your Hotpoint washing machine in excellent working order. Make running a cleaning cycle a regular part of your routine to ensure your appliance remains clean, efficient, and reliable. This dedication to maintenance will pay off in the long run, ensuring your machine continues to meet your needs and provide excellent service. Always remember, a well-maintained machine is a happy machine, and running a cleaning cycle every 40 washes is a key part of that process. Take the time to do it right and enjoy the benefits of a Hotpoint washing machine that performs at its best. This simple step is a crucial part of keeping your appliance in top shape, so don’t overlook its importance. Always stay proactive with maintenance and run the cleaning cycle as recommended to keep your machine running smoothly and efficiently. By doing so, you’ll be able to enjoy a cleaner, more reliable appliance that continues to deliver excellent results for years to come. This small effort will make a big difference in the performance and longevity of your Hotpoint washing machine, so make it a part of your regular routine. Always prioritize the health and efficiency of your appliance by running the cleaning cycle every 40 washes, and you’ll be rewarded with a machine that runs like new. This simple practice is essential for maintaining the quality and performance of your Hotpoint washing machine, so don’t forget to include it in your maintenance schedule. By staying on top of regular cleaning cycles, you can ensure your appliance remains in excellent condition and continues to meet all your laundry needs. Always remember, a clean machine is a efficient machine, and this cycle is a quick and easy way to achieve that. Take the time to run it regularly and enjoy the benefits of a well-maintained Hotpoint washing machine. This small step can make a significant difference in the performance and longevity of your appliance, so don’t overlook its importance. Always stay proactive with maintenance to keep your machine in the best possible condition. Running a cleaning cycle every 40 washes is a quick and easy way to ensure your Hotpoint washing machine remains clean, efficient, and ready to handle your laundry needs. Make it a part of your routine and reap the rewards of a machine that performs like new for years to come. This small effort will contribute significantly to the overall health and functionality of your appliance, ensuring it continues to serve you well. Always remember, regular cleaning cycles

Troubleshooting Common Issues

This section helps identify and resolve common issues with your Hotpoint washing machine, ensuring efficient operation. Refer to error codes and solutions to address problems effectively.

6.1 Identifying and Resolving Error Codes

Understanding error codes is crucial for diagnosing and resolving issues with your Hotpoint washing machine. Error codes like E01 or E02 typically indicate specific problems, such as drainage issues or sensor malfunctions. Always refer to your user manual or the Hotpoint website for code meanings. If an error persists, ensure the filter and drain hose are clean, as outlined in the maintenance section; For unresolved issues, contact Hotpoint customer support for professional assistance. Regular checks and prompt action can prevent minor problems from escalating, ensuring optimal performance and longevity of your machine.

6.2 Addressing Common Operational Problems

Common issues with your Hotpoint washing machine can often be resolved with simple troubleshooting. If the machine doesn’t start, check the child lock or ensure it’s properly plugged in. Noise during operation may indicate an unbalanced load or blockages in the drain hose. If the machine stops mid-cycle, verify that the water supply is on and the filter is clean. For persistent issues, refer to the user manual or contact Hotpoint support. Regular maintenance, such as cleaning the filter and checking for blockages, can prevent many operational problems and ensure smooth performance.

Eco-Friendly Features and Energy Efficiency

This section explores eco-friendly features like the Eco 40-60 cycle, designed for energy efficiency, and the Long Cotton Cycle, which gently cares for fabrics while saving resources;

7.1 Using Eco 40-60 Cycle for Energy Savings

The Eco 40-60 cycle is a energy-efficient program designed to reduce energy consumption while maintaining excellent washing performance. This cycle is ideal for everyday loads, using optimized water and temperature settings to minimize energy use. By selecting this mode, you contribute to lower utility bills and a smaller environmental footprint. The Eco 40-60 cycle is also gentle on fabrics, ensuring your clothes are cared for while saving resources. For optimal results, use this cycle for lightly soiled laundry to maximize energy efficiency and extend the life of your garments.

7.2 Benefits of the Long Cotton Cycle

The Long Cotton Cycle is specifically designed for heavily soiled cotton fabrics, ensuring a deep and thorough clean. This extended cycle uses higher temperatures and longer wash times to tackle tough stains and remove embedded dirt. It is ideal for large or bulky items, providing exceptional fabric care while maintaining their quality. The cycle’s gentle yet effective agitation prevents damage to cotton fibers, ensuring your clothes remain soft and durable. By utilizing this cycle, you can achieve professional-grade cleaning results at home, making it perfect for households with frequent laundry needs.

Safety Precautions

Always follow essential safety tips to ensure safe operation of your Hotpoint washing machine. Keep children away, avoid overloading, and never use damaged plugs or sockets.

8.1 Essential Safety Tips for Users

To ensure safe operation of your Hotpoint washing machine, always follow these guidelines: Keep the machine on a stable, level surface to prevent tipping. Avoid overloading the drum, as this can cause imbalance and damage. Never use hot water for delicate fabrics, and always check care labels. Store detergent out of children’s reach to prevent accidental ingestion. Unplug the machine during maintenance or repairs. Do not lean on the door or use it as a shelf. Regularly inspect the power cord and plugs for damage. Adhere to these tips to maintain safety and prolong your machine’s lifespan.

8.2 Child Safety Features and Guidelines

Hotpoint washing machines include child safety features to prevent accidents. Activate the child lock by pressing and holding the appropriate button to avoid unintended operation. Keep children away from the machine during cycles, as moving parts can cause injury. Store detergent in a secure location to prevent accidental ingestion. Regularly inspect the machine for any damage and ensure it is installed on a stable surface. Always supervise children near the washing machine and teach them to avoid tampering with controls. These guidelines help protect your family and ensure safe appliance use.

Downloading and Accessing User Manuals

Access official Hotpoint washing machine user manuals online for free. Visit the Hotpoint website, enter your model number, and download the PDF guide for detailed instructions and troubleshooting.

9.1 Finding the Right User Manual Online

To find the correct user manual for your Hotpoint washing machine, visit the official Hotpoint website. Navigate to the “Support” or “Manuals” section; Enter your machine’s model number, located on the rear or bottom panel, in the search bar. Select your specific model from the results to access the corresponding PDF manual. Ensure the manual matches your model for accurate instructions. If unsure, refer to the product label or user guide that came with your machine. This ensures you access the most relevant information for your appliance.

9.2 Downloading PDF Versions of Hotpoint Manuals

Downloading PDF versions of Hotpoint manuals is a convenient way to access instructions anytime. Visit the official Hotpoint website or trusted online platforms like ManualsLib. Use the search bar to input your washing machine’s model number, ensuring accuracy. Select the correct model from the results to download the PDF manual. Many models, such as the Hotpoint WMEF 742 or HV8B 593, have manuals readily available. Save the PDF to your device for easy reference, eliminating the need for physical copies. This ensures you always have essential information at your fingertips;

Manufacturer Support and Resources

Hotpoint offers dedicated customer service and extensive resources to support your washing machine experience. Visit their official website or contact their support team for assistance, ensuring optimal performance and resolving any queries efficiently.

10.1 Contacting Hotpoint Customer Service

To contact Hotpoint customer service, visit their official website or refer to the user manual for contact details. Hotpoint provides dedicated support for inquiries, troubleshooting, and maintenance. Their team assists with error codes, operational issues, and repair services. You can also download user manuals and access additional resources online. For specific models like WMEF 742 or HV8B 593, Hotpoint ensures comprehensive support to address your needs effectively. Reach out to their support team for personalized assistance, ensuring your washing machine operates at its best.

10.2 Additional Resources for Maintenance and Repair

For further assistance, visit the official Hotpoint website to access downloadable user manuals, troubleshooting guides, and video tutorials. Additional resources include community forums and authorized service centers for expert advice. Regularly updating your knowledge through these channels ensures optimal performance and longevity of your appliance. Hotpoint also offers dedicated customer support for complex repairs, emphasizing the use of genuine parts for maintenance. These resources collectively provide a comprehensive support network to address any questions or issues you may encounter with your washing machine.

wilds of eldraine sealed guide

Welcome to the Wilds of Eldraine Sealed Guide, your ultimate resource for navigating this enchanting set. Discover key mechanics, strategies, and tips to build competitive decks and dominate your Sealed events with confidence;

Overview of Wilds of Eldraine Set Mechanics

Wilds of Eldraine introduces a blend of returning and new mechanics, creating a dynamic Limited environment. The set brings back Adventure cards, which offer versatility by doubling as spells and creature abilities, and Food tokens, providing mana efficiency and lifegain. New mechanics include Bargain, allowing players to trade life for card advantage, Roles, powerful aura tokens enhancing creatures, and Celebration, enabling card draw when creatures attack. These mechanics interact intricately, rewarding strategic deck-building and gameplay. The set balances aggression, midrange, and control playstyles, making it both fun and competitive for Sealed events. Understanding these mechanics is key to unlocking success in Wilds of Eldraine Limited.

Importance of Understanding the Format for Success

Mastering Wilds of Eldraine Sealed requires a deep grasp of its unique mechanics and strategic implications. Each card’s role in the format, whether it’s a versatile Adventure or a synergistic Role token, can shift the game’s balance. Understanding how Food tokens fuel combos and how Bargain trades life for advantage is crucial. The format’s speed and interactions demand precise deck-building and in-game decisions. By recognizing the strengths of each archetype and adapting to matchups, players can maximize their chances of success. This guide equips you with the insights needed to navigate the complexities of Wilds of Eldraine Sealed, ensuring you’re prepared for any scenario at your next event.

Core Mechanics in Wilds of Eldraine

Wilds of Eldraine introduces unique mechanics like Adventure cards, Food tokens, Bargain, Roles, and Celebration, each offering distinct strategic opportunities. These mechanics create a dynamic, decision-rich environment that rewards adaptability and synergy, making the set both engaging and challenging for players.

Adventure Cards and Their Impact on Deck Building

Adventure cards in Wilds of Eldraine offer dual functionality, providing both an instant/sorcery mode and a creature mode. This versatility allows players to maximize card efficiency, as Adventures can serve multiple roles throughout a game. When building a Sealed deck, prioritizing Adventure cards is crucial, as they provide both early-game interaction and late-game threats. Their ability to be cast twice (once as a spell and once as a creature) adds significant value, making them excellent for balancing mana curves and ensuring consistent pressure. Including Adventures in your deck helps maintain flexibility, enabling stronger, more adaptable strategies in competitive play.

Food Tokens and Their Strategic Value

Food tokens in Wilds of Eldraine are a powerful resource, providing both defensive and offensive opportunities. They can be generated by specific cards and used to cast “Bargain” spells, offering significant advantages. Food tokens allow players to maintain card parity while disrupting opponents, making them invaluable in mid-to-late game scenarios. Their ability to be stockpiled enables flexible strategies, ensuring that players can adapt to changing board states. Additionally, Food tokens enhance deck resilience, providing an alternative source of card advantage. Proper management of these tokens is crucial, as they can swing games in favor of the player who utilizes them effectively, making them a key element in competitive Sealed deck builds.

Bargain Mechanic: How It Changes the Game

The Bargain mechanic revolutionizes gameplay by enabling players to cast powerful spells at a reduced cost in exchange for sacrificing a permanent. This mechanic introduces strategic depth, as players must weigh the immediate benefits of cheaper spells against the long-term risks of losing valuable permanents. Bargain synergizes seamlessly with Food tokens, allowing for explosive plays and maintaining card advantage. It also influences deck-building by favoring strategies that generate or exploit sacrificial targets. Properly leveraging Bargain can lead to game-changing moments, making it a pivotal element in competitive strategies. Mastering this mechanic is essential for success in Wilds of Eldraine Sealed, where adaptability and resource management are key to outmaneuvering opponents.

Roles: Enhancing Creatures with Auras

Roles are a new type of token in Wilds of Eldraine, functioning as auras that enhance creatures with unique abilities. These tokens come in six variations: Cursed, Monster, Royal, Sorcerer, and two others, each granting distinct powers like trample, ward, or card draw. Players can attach these roles to their creatures, significantly boosting their effectiveness on the battlefield. Roles add a layer of strategy, as they can be applied dynamically to adapt to evolving board states. Properly utilizing roles allows for more versatile and powerful creatures, making them a key component in competitive deck-building and gameplay. This mechanic encourages creative combinations, enhancing the depth and complexity of the set’s strategies.

Celebration: Synergy and Card Advantage

Celebration is a powerful mechanic in Wilds of Eldraine that rewards players for casting multiple spells in a single turn. This mechanic triggers when you cast your second spell in a turn, granting card advantage through effects like card draw or token generation. Celebration synergizes well with bargain and roles, creating explosive turns that can shift the game’s momentum. By building decks with low mana costs and high spell density, players can maximize celebration’s potential, ensuring consistent value and pressure on the opponent. Properly leveraging celebration can lead to significant advantages, making it a central strategy in competitive sealed deck builds.

Evaluating Creatures and Non-Creature Spells

Evaluating creatures and non-creature spells is crucial in Wilds of Eldraine Sealed. Creatures form the backbone of sealed decks, while non-creature spells provide removal, card draw, and utility, ensuring balanced deck performance.

Key Creatures for Sealed Deck Success

In Wilds of Eldraine, creatures are the cornerstone of any successful Sealed deck. Look for efficient, high-impact creatures like Hamlet Glutton, which dominates boards with its size and synergies. Ferocious Werefox offers trample and surprising durability, while Edgewall Pack excels in aggressive strategies. Midrange decks benefit from Hollow Scavenger and Sweettooth Witch, providing value and longevity. Additionally, Rootrider Faun and Redtooth Genealogist shine in green and Selesnya builds, respectively. Prioritize creatures with evasion, removal resistance, or synergy with set mechanics like Food or Roles to maximize your deck’s effectiveness in the competitive Wilds of Eldraine Sealed format.

Non-Creature Spells: Removal, Counters, and Card Draw

Non-creature spells are vital for controlling the board and generating card advantage. Torch the Tower and Candy Grapple provide reliable removal, while Into the Fae Court offers card draw and tempo. Counters like Ice Out and Spell Stutter are crucial for disrupting opponents. These spells synergize with mechanics like Bargain, enabling efficient plays. In Sealed, prioritize versatile removal and card draw to adapt to various matchups. Balancing these spells with creature threats ensures a well-rounded strategy, making them indispensable in competitive Wilds of Eldraine decks.

Mechanics-Based Card Evaluations

Evaluating cards in Wilds of Eldraine requires a focus on synergy with set mechanics. Cards like Hopeful Vigil and Johann’s Stopgap shine due to their Bargain mechanic, offering versatility and value. Adventure cards, such as Gingerbrute, provide dual utility, enhancing deck flexibility. Food tokens enable strategies around Hamlet Glutton, while Roles like Young Hero boost creatures. Celebration synergies with Ratcatcher Trainee reward aggressive plays. Each mechanic influences card value, making it crucial to prioritize cards that leverage these interactions effectively for a cohesive gameplan.

Deck Archetypes in Wilds of Eldraine Sealed

Wilds of Eldraine Sealed features distinct deck archetypes, including aggressive Boros and Rakdos builds, midrange strategies like Golgari Food, and controlling options such as Dimir and Simic approaches.

Aggro Decks: Boros, Rakdos, and Gruul Strategies

Aggressive decks thrive in Wilds of Eldraine, with Boros, Rakdos, and Gruul leading the charge. Boros leverages low-cost creatures and combat tricks like Archon’s Glory to maintain tempo. Rakdos focuses on swarming the board with cheap, evasive threats and utilizing Food tokens for sustain. Gruul, with its emphasis on beasts and trample, uses cards like Ferocious Werefox to overrun opponents. These archetypes excel at applying early pressure, forcing opponents into defensive positions. Efficient removal and curve consideration are key to their success, making them formidable in Sealed formats.

Midrange Decks: Golgari Food and Selesnya Roles

Golgari Food and Selesnya Roles define the midrange strategies in Wilds of Eldraine. Golgari Food revolves around generating and utilizing Food tokens to fuel powerful plays, with creatures like Sweettooth Witch and Hamlet Glutton serving as win conditions. Selesnya Roles enhances creatures with aura tokens, such as Cursed or Royal, to create formidable threats. Both archetypes balance aggression with resilience, using their unique mechanics to outlast opponents. Golgari’s sustainability and Selesnya’s versatile enhancements make these decks adaptable and potent in Sealed play, capable of transitioning smoothly from early-game pressure to late-game dominance.

Control Decks: Dimir, Izzet, and Simic Approaches

Control decks in Wilds of Eldraine thrive through strategic card advantage and disruption. Dimir excels at milling and value generation, leveraging cards like Into the Fae Court to gain card superiority. Izzet employs counterspells and card draw, with Spell Stutter and Sleight of Hand controlling the tempo. Simic focuses on ramp and big-mana plays, utilizing Rootrider Faun and Ferocious Werefox to dominate late-game. Each archetype emphasizes patience, using their unique mechanics to outlast opponents and secure victory through superior board states and resource management.

Color Pairings and Synergies

Wilds of Eldraine offers diverse color pairings, each with unique strengths. Explore how combining colors like Azorius, Dimir, Rakdos, Gruul, and Selesnya creates powerful synergies for competitive deck-building strategies.

White-Blue (Azorius): Tempo and Control

Azorius excels at controlling the board with efficient creatures and counterspells. White provides cheap, impactful creatures like Hopeful Vigil and Archons Glory, while blue offers card draw and disruption with Spell Stutter and Sleight of Hand. The Celebration mechanic shines here, generating card advantage through low-cost spells. Tempo is maintained with Flying creatures and flash threats, pressuring opponents early. Bargain synergizes well with white’s removal, enabling cheap interactions. While less aggressive than other archetypes, Azorius thrives in midrange and control builds, leveraging its ability to outvalue opponents. It’s a versatile pairing, ideal for players who prefer precision and consistency over raw power.

Blue-Black (Dimir): Milling and Card Advantage

Dimir combines black’s removal and creatures with blue’s card draw and evasion. The Mill mechanic is central, rewarding you for filling graveyards. Cards like Into the Fae Court and Hopeless Nightmare provide card advantage while fueling your mill strategy. Black’s Bargain mechanic enhances graveyard synergies, enabling cheap removal and creature plays. Flying creatures like Fae Whispers maintain tempo, while Celebration generates incremental value. Dimir excels in longer games, where card draw and value engines outlast opponents. It’s a versatile pairing, capable of adapting to both aggressive and controlling metas, making it a strong choice for players who enjoy manipulating the battlefield and leveraging graveyard synergies.

Black-Red (Rakdos): Sacrifice and Aggro

Rakdos is a relentless aggro-combo deck that thrives on sacrifice synergies and early-game pressure. Cards like Candy Grapple and Mintstrosity enable cheap, aggressive starts. The Bargain mechanic amplifies this by turning creature deaths into advantages, fueling card draw and removal. Ratcatcher Trainee and Rat Out shine in this archetype, leveraging sacrifice triggers and generating Celebration value. Rakdos excels at flooding the board, forcing opponents into unfavorable trades. Pair this with black’s removal and red’s burn to create a tempo nightmare. It’s a high-reward, risk-reward strategy that punishes slower decks, making it ideal for players who enjoy aggressive, interactive games with explosive potential.

Red-Green (Gruul): Beasts and Trample

Gruul is a force to be reckoned with, focusing on powerful creatures and trample effects. Cards like Edgewall Pack and Ferocious Werefox dominate the board with their high power and evasion. Green’s ramp and fixing spells ensure smooth curves, while red’s removal and burn clear paths. The Bargain mechanic adds depth, allowing sacrifices to fuel card draw. Hamlet Glutton stands out as a mid-game powerhouse, while Hollow Scavenger provides value in longer games. Gruul excels at overwhelming opponents with large threats, making it a top choice for players who prefer a straightforward, aggressive strategy. Its ability to scale into the late game ensures it remains competitive across all stages of the match.

Green-White (Selesnya): Tokens and Lifegain

Selesnya combines token generation with lifegain to create a resilient and aggressive gameplan. Cards like Hopeful Vigil and Stockpiling Celebrant provide early board presence and synergize with Roles, enhancing creatures with auras. Green’s ramp and fixing ensure smooth transitions into heavier hitters, while white’s combat tricks like Archons Glory protect your army. Lifegain from Hopeless Nightmare and Sweettooth Witch bolsters defenses, enabling long-term strategies. Selesnya’s strength lies in flooding the board and protecting investments, making it ideal for players who enjoy value-based, midrange strategies. Its ability to adapt to both aggressive and controlling metas ensures consistent performance in Sealed events.

Advanced Strategies for Sealed Success

Optimize your mana base, leverage Bargain and Celebration synergies, and enhance creatures with Role tokens. These advanced tactics maximize efficiency and adaptability, ensuring consistent performance in competitive Sealed events.

Mana Base Considerations

Building a stable mana base is crucial for success in Wilds of Eldraine Sealed. Prioritize dual lands and fetches to support your chosen colors. Ensure at least 8-10 lands in your 40-card deck, with a balance of basics and duals. Consider splashing a third color if your pool supports it. Pay attention to the curve of your deck—aggressive decks need more early-game mana, while midrange and control decks can afford slightly higher mana requirements. Use mana-efficient removal spells like Candy Grapple and Torch the Tower to maintain board control. Leverage Bargain and Celebration synergies to optimize mana usage, ensuring you can cast spells after using these abilities. Adjust your land count based on the number of high-mana cost cards in your deck. A well-tuned mana base ensures smooth gameplay and maximizes your chances of victory.

Bargain and Celebration Synergies

Bargain and Celebration are powerful mechanics in Wilds of Eldraine that reward strategic planning. Bargain allows sacrificing a creature to cast a spell at a reduced cost, enabling explosive plays and maintaining tempo. Pair Bargain with creatures like Hamlet Glutton or Edgewall Pack for maximum impact. Celebration, which triggers when you cast two spells in a turn, synergizes well with cheap removal and creature enhancers. Use Celebration to fuel card draw or generate tokens, amplifying your advantage. Combine both mechanics to create devastating combos, such as sacrificing a creature with Bargain and triggering Celebration for additional benefits. Mastering these synergies can transform your deck into a formidable force, ensuring consistent pressure and card advantage in every game.

Role Tokens and Creature Enhancements

Role tokens are a key mechanic in Wilds of Eldraine, offering six unique enhancements for creatures. These tokens act as auras, granting abilities like trample, ward, or mana generation. For instance, the Monster role boosts power and toughness while adding trample, making creatures formidable attackers. The Royal role provides a defensive edge with ward, protecting your creatures from removal. Strategic use of roles can transform average creatures into game-changers. Pairing these tokens with synergistic cards like Archons Glory or Hopeful Vigil amplifies their impact. Roles also interact with other mechanics, such as Bargain and Celebration, creating powerful combinations. Mastering role tokens is essential for maximizing creature potential and outmaneuvering opponents in Sealed deck play.

Final Tips and Tricks

Prioritize Food Tokens for sustained card advantage and synergize Bargain with removal spells. Leverage Celebration triggers to maximize card draw and tempo. Adapt to the metagame by focusing on versatile threats and answers.

Common Pitfalls to Avoid

Avoid overextending with low-impact creatures early, as this can leave you vulnerable to removal spells and aggressive strategies. Don’t underestimate the power of Food Tokens, as they provide lasting value. Overrelying on Bargain can backfire if opponents disrupt your synergies. Be cautious of Celebration triggers, as they can sometimes slow your momentum. Neglecting Role Tokens limits your creature enhancement options. Overcommitting to a single strategy without adaptability can lead to losses. Finally, mulligan aggressively if your opening hand lacks early plays or necessary lands to support your curve.

Adapting to Meta Shifts

As the meta evolves, staying flexible is crucial. Identify dominant strategies like Golgari Food or Boros Aggro and adjust your deck accordingly. If control decks rise, incorporate more counterspells and card draw. Conversely, if aggro prevails, prioritize early-game creatures and removal. Experiment with Role Tokens to enhance resilience against removal-heavy decks. Keep an eye on Bargain synergies, as they can shift from niche to central. Adapt your mana base to support splashes for key cards. Stay observant and willing to pivot based on what performs well in events. Flexibility ensures longevity in a dynamic format like Wilds of Eldraine Sealed.

melina guida only fans

Melina Guida is a prominent Only Fans creator known for her engaging content and unique personality. Her rise to fame highlights her ability to connect with audiences through authenticity and creativity‚ making her a standout figure in the platform’s vibrant community.

1.1. Who is Melina Guida?

Melina Guida is a talented model‚ actress‚ and popular Only Fans creator‚ known for her captivating content and unique style. With a background in the entertainment industry‚ she has successfully transitioned to digital platforms‚ offering exclusive content that showcases her creativity and authenticity‚ making her a beloved figure among her subscribers and fans worldwide.

1.2. Rise to Fame and Popularity

Melina Guida’s rise to fame began with her captivating content on Only Fans‚ where her authenticity and creativity quickly attracted a large following. Her ability to connect with fans through exclusive posts and engaging interactions helped her stand out in the competitive platform. Over time‚ she became a prominent figure‚ known for her unique style and dedication to her audience‚ solidifying her status as a top creator.

Early Life and Career

Melina Guida’s early life and career laid the foundation for her success. Before gaining fame‚ she explored various creative avenues‚ developing skills that would later define her online presence and appeal to her audience.

2.1. Biography and Background

Melina Guida’s biography reveals a journey marked by passion and creativity. Born with a flair for self-expression‚ she nurtured her interests in art and communication from an early age. Her background‚ though not widely detailed‚ suggests a strong foundation in understanding audience engagement‚ which later became pivotal in her Only Fans career. This blend of personal charm and strategic insight has made her a compelling figure in the digital space.

2.2. Career Before Only Fans

Before joining Only Fans‚ Melina Guida explored various creative avenues‚ honing her skills in modeling and performance. Her early career laid the groundwork for her ability to captivate audiences‚ emphasizing authenticity and individuality. This foundation ultimately paved the way for her successful transition to Only Fans‚ where she leveraged her unique style and engaging personality to build a loyal following.

Content Strategy on Only Fans

Melina Guida’s content strategy revolves around authenticity and creativity‚ offering a mix of exclusive photos‚ videos‚ and engaging live streams. Her approach fosters a loyal fanbase.

3.1. Types of Content Posted

Melina Guida posts a variety of content‚ including exclusive photos‚ videos‚ and live streams. She shares behind-the-scenes glimpses into her life‚ fashion choices‚ and creative projects. Her content often features interactive elements like polls and Q&A sessions‚ fostering a direct connection with her audience. This diversity in content caters to different fan preferences‚ ensuring consistent engagement and a loyal follower base.

3.2. Engagement with Fans and Subscribers

Melina Guida actively engages with her fans through personalized interactions‚ such as responding to comments and direct messages. She hosts live streams and Q&A sessions‚ fostering a sense of community. By sharing behind-the-scenes content and involving fans in creative decisions‚ she builds a loyal and supportive audience. This approachable and interactive style strengthens her connection with subscribers‚ making them feel valued and appreciated.

Unique Selling Points

Melina Guida’s authenticity‚ creativity‚ and exclusive content set her apart. Her personal style and engaging approach attract a loyal audience‚ ensuring a unique experience for subscribers.

4.1. Personal Branding and Style

Melina Guida’s personal branding revolves around authenticity and creativity. Her unique style‚ blending bold fashion choices with a relatable persona‚ captivates her audience. By staying true to herself‚ she builds a loyal fan base‚ showcasing a confident and original identity that sets her apart in the competitive Only Fans landscape‚ making her a standout creator with a memorable presence.

4.2. Exclusive Content and Offers

Melina Guida offers exclusive content‚ including behind-the-scenes access and personalized experiences‚ to her Only Fans subscribers. She engages fans with polls‚ Q&A sessions‚ and limited-time offers‚ fostering a sense of community. Her premium content strategy ensures subscribers feel valued‚ enhancing their loyalty and satisfaction with her unique and interactive approach to fan engagement and content delivery.

Challenges and Controversies

Melina Guida faces challenges like legal and ethical issues‚ scrutiny over content‚ and public criticism. She navigates these controversies while maintaining her brand and fanbase loyalty.

5.1. Criticism and Public Perception

Melina Guida has faced criticism for her content choices‚ with some questioning her decisions. Public perception varies‚ with fans praising her authenticity while critics highlight societal norms. Despite this‚ she remains resilient‚ leveraging her platform to maintain a loyal fanbase and navigate the challenges of public scrutiny with grace and determination‚ ensuring her voice is heard.

5.2. Legal and Ethical Issues

Melina Guida has encountered legal challenges related to content policies and copyright concerns. Ethical debates surrounding her work often focus on privacy and exploitation. While she adheres to platform guidelines‚ critics argue for stricter regulations. She continues to navigate these complexities‚ emphasizing transparency and consent to maintain trust with her audience and comply with legal standards in the evolving digital landscape.

Earnings and Financial Success

Melina Guida has achieved significant financial success through her Only Fans platform‚ leveraging exclusive content and strategic collaborations to build a steady revenue stream and loyal subscriber base.

6.1. Revenue Streams and Income Sources

Melina Guida’s primary income comes from Only Fans subscriptions‚ where she offers exclusive content. Additional revenue streams include tips‚ sponsored posts‚ and merchandise sales. Her strategic engagement with fans and consistent content updates attract a loyal subscriber base‚ contributing to her financial success and growth in the competitive digital content creation space.

6.2. Net Worth and Financial Growth

Melina Guida’s net worth reflects her successful career on Only Fans‚ showcasing significant growth over the years. Her ability to build a loyal fan base and consistently deliver high-quality content has fueled her financial success‚ establishing her as one of the platform’s top earners and a prominent figure in the digital content creation industry.

Collaborations and Partnerships

Melina Guida collaborates with fellow creators and brands‚ enhancing her content and reach. These partnerships often include exclusive projects‚ expanding her influence and appeal in the digital space.

7.1. Collaborations with Other Creators

Melina Guida actively collaborates with other Only Fans creators‚ fostering a sense of community and creativity. These partnerships often involve joint content projects‚ exclusive deals‚ and cross-promotions‚ which help expand her audience and diversify her offerings. By working with influencers and models‚ she strengthens her network and enhances her platform’s appeal‚ creating a win-win scenario for all involved while engaging her fan base more deeply.

7.2. Brand Partnerships and Sponsorships

Melina Guida has secured brand partnerships and sponsorships‚ enhancing her career and content offerings. These collaborations often involve promoting products or services aligned with her personal brand‚ allowing her to connect with a broader audience. Such partnerships not only boost her visibility but also provide fans with exclusive deals‚ further solidifying her influence and appeal in the digital content creation space.

Future Plans and Goals

Melina Guida plans to expand her content‚ explore new platforms‚ and launch collaborations‚ aiming to diversify her brand and increase her global influence and reach.

8.1. Expanding Content and Platforms

Melina Guida aims to broaden her digital presence by exploring new platforms and diversifying her content. She plans to create more interactive and exclusive material‚ such as behind-the-scenes videos and personalized posts‚ to engage her audience further. Additionally‚ she intends to leverage emerging platforms like YouTube and TikTok to expand her reach and connect with fans globally‚ ensuring her brand remains dynamic and evolving.

8.2. Long-Term Career Aspirations

Melina Guida aspires to evolve beyond Only Fans‚ aiming to establish herself as a multifaceted entrepreneur and influencer. She plans to explore opportunities in fashion‚ lifestyle‚ and wellness while maintaining her core connection with fans. By diversifying her brand‚ she seeks to build a sustainable career‚ ensuring her influence extends across various industries and digital platforms for years to come.

Impact on Social Media and Pop Culture

Melina Guida significantly influences social media trends and pop culture through her authentic content and engagement‚ inspiring self-expression and setting new standards in digital influence.

9.1. Influence on Social Media Trends

Melina Guida’s authentic content and engaging personality have significantly shaped social media trends. Her unique style and ability to connect with fans inspire trends‚ fostering a sense of community and encouraging followers to emulate her creativity. By sharing behind-the-scenes glimpses and exclusive offers‚ she keeps her audience captivated‚ driving viral engagement and setting new standards for digital influence.

9.2. Contribution to Pop Culture

Melina Guida has redefined norms in pop culture by normalizing diverse content creation. Her authenticity and creativity inspire trends‚ influencing a broader audience. As a trendsetter‚ she challenges traditional norms‚ fostering acceptance and sparking conversations. By blending personal style with relatability‚ she has become a cultural icon‚ shaping modern digital expression and empowering creators to embrace individuality.

Fan Community and Support

Melina Guida’s fan community is highly engaged‚ actively participating in discussions and supporting her work. Fans appreciate her authenticity‚ fostering a loyal and dedicated supporter base.

10.1. Fan Reactions and Feedback

Fans of Melina Guida often express admiration for her authenticity and engaging personality. Many appreciate her interactive approach‚ sharing positive feedback and personal stories of how her content resonates with them. Supporters frequently highlight her ability to create a sense of connection‚ fostering a loyal and enthusiastic community around her work.

10.2. Role of Fans in Her Success

Melina Guida’s fans play a pivotal role in her success‚ providing both financial and emotional support. Their subscriptions‚ tips‚ and enthusiastic engagement fuel her career growth. Fans also actively promote her content‚ expanding her reach and helping her build a loyal community. Their dedication underscores the importance of audience interaction in her journey to becoming a prominent Only Fans creator.

Comparison with Other Only Fans Creators

Melina Guida stands out among Only Fans creators due to her unique authenticity and creative content approach‚ distinguishing her from others in the competitive platform landscape.

11.1; Unique Aspects Compared to Others

Melina Guida’s authenticity‚ creativity‚ and personalized engagement set her apart from other Only Fans creators. Her ability to connect deeply with fans through unique content and genuine interactions fosters a loyal community‚ distinguishing her in a competitive space while maintaining a strong personal brand.

11.2. Industry Standing and Recognition

Melina Guida is widely recognized as a prominent figure in the Only Fans community‚ celebrated for her innovative content and dedication to fan engagement. While she may not have received major awards‚ her influence and loyal fanbase underscore her significant impact and standing within the industry‚ solidifying her reputation as a trailblazer among content creators.

Melina Guida’s journey exemplifies resilience and creativity‚ leaving a lasting impact on her audience. Her authenticity and dedication have cemented her legacy‚ inspiring future creators.

12.1. Summary of Her Journey

Melina Guida’s journey from obscurity to prominence reflects her adaptability and resilience. Starting with modest beginnings‚ she leveraged unique content and fan engagement to carve a distinctive niche‚ evolving into a celebrated figure in the digital space. Her ability to connect authentically with audiences has been pivotal in her enduring success and influence.

12.2. Future Prospects and Legacy

Melina Guida aims to expand her content offerings and explore new platforms‚ solidifying her influence in the digital space. Her legacy is likely to be defined by her authenticity and ability to inspire others‚ leaving a lasting impact on the creator economy and pop culture through her unique approach to personal branding and fan engagement.

guide to passing the pearson vue real estate exam pdf

The Pearson VUE Real Estate Exam is a critical step for aspiring real estate professionals, assessing knowledge of laws, contracts, and ethics to ensure competency in the field.

1.1. Overview of the Exam Format and Content

The Pearson VUE Real Estate Exam consists of multiple-choice questions designed to test your knowledge of real estate laws, contracts, ethics, and professional practices. The exam format typically includes a set number of questions within a specific time limit, ensuring candidates demonstrate their understanding of key concepts and practical applications. Content areas are divided into sections, focusing on legal principles, contractual obligations, and ethical decision-making, all essential for a successful real estate career.

1.2. Importance of Passing the Exam for Real Estate Licensing

Passing the Pearson VUE Real Estate Exam is a mandatory requirement for obtaining a real estate license, enabling professionals to legally practice in the field. It validates their expertise in real estate principles, ensuring they can operate ethically and competently. Success on the exam opens doors to career opportunities, enhances credibility, and allows individuals to build a successful and reputable real estate business.

Preparation Strategies for Success

Develop a structured study plan, utilize practice exams, and enroll in prep courses to build confidence and mastery of real estate concepts and exam format.

2.1. Creating an Effective Study Plan

A well-structured study plan is essential for success. Break down the exam content into manageable sections, set realistic milestones, and allocate time for practice exams. Incorporate active learning techniques, such as flashcards and notes, to reinforce key concepts; Prioritize areas where you need improvement and schedule regular review sessions. Consistency is key to mastering the material and building confidence for exam day.

2.2. Utilizing Practice Exams and Study Materials

Practice exams are crucial for familiarizing yourself with the exam format and identifying weak areas. Use study guides and online resources to enhance your preparation. Flashcards and summaries can help reinforce key terms and concepts. Additionally, enroll in courses or join study groups to gain deeper insights and stay motivated. Regularly reviewing and applying these materials ensures comprehensive understanding and readiness for the exam.

Understanding the Exam Format

The Pearson VUE Real Estate Exam is a computer-based test featuring multiple-choice and scenario-based questions. It typically includes 80 questions within a 120-minute timeframe, requiring strong time management and preparation.

3.1. Breakdown of Question Types and Exam Structure

The Pearson VUE Real Estate Exam consists of multiple-choice and scenario-based questions. It typically includes 80 questions, with a mix of general real estate topics and state-specific content. The exam is divided into sections covering real estate law, contracts, ethics, and local regulations. Candidates have 120 minutes to complete the exam, and the format emphasizes practical application of knowledge to real-world scenarios, requiring thorough preparation and understanding of key concepts. Utilizing practice exams helps familiarize candidates with the structure and question types.

3.2. Time Management During the Exam

Effective time management is crucial for success on the Pearson VUE Real Estate Exam. Allocate approximately one minute per question, leaving extra time for complex scenarios. Prioritize questions you’re confident about first, then revisit challenging ones. Use the process of elimination to narrow down answers, ensuring you stay within the 120-minute timeframe. Practice time management during study sessions to build efficiency and reduce exam-day stress.

Key Content Areas to Focus On

Focus on real estate law, contracts, ethics, and property valuation. Mastering these foundational concepts ensures a strong understanding of the exam’s core topics and practical applications.

4.1. Real Estate Law and Contracts

Mastering real estate law and contracts is essential for exam success. Focus on understanding property rights, types of contracts, and legal obligations. Key areas include contract formation, breach, and remedies. Pay attention to real estate statutes, disclosure requirements, and agency relationships. Practice analyzing contract clauses and scenarios to apply legal principles effectively. This section tests your ability to navigate complex legal situations accurately and ethically in real estate transactions.

4.2. Ethics and Professional Practices

Ethics and professional practices are fundamental to the real estate exam, ensuring fair and honest dealings. Key topics include fiduciary duties, client relationships, and avoiding conflicts of interest. Understand the REALTOR® Code of Ethics and its applications. Focus on scenarios requiring ethical decision-making, such as disclosure obligations and fair housing laws. Demonstrating a strong grasp of professional conduct is crucial for licensing and maintaining trust in the real estate industry.

Test-Taking Tips and Tricks

Mastering test-taking strategies is essential. Focus on time management, prioritize high-point questions, and use elimination techniques to enhance accuracy and confidence during the exam.

5.1. How to Approach Multiple-Choice Questions

Approach multiple-choice questions by reading them carefully and identifying key terms. Eliminate obviously incorrect answers first to narrow down options. Recognize absolute terms like “always” or “never,” which are often incorrect. Use practice exams to familiarize yourself with question formats. Manage your time wisely, setting limits per question to avoid getting stuck. Stay calm and focused to maintain clarity. Study key areas like real estate law and ethics to build a strong foundation. Engage with study groups for additional insights and strategies.

5.2. Strategies for Staying Calm and Focused

Staying calm and focused is crucial for exam success. Practice deep breathing exercises to reduce anxiety. Maintain a consistent study routine to build confidence. Get adequate sleep before the exam to ensure mental clarity. Avoid caffeine and heavy meals that can cause discomfort. Visualize success to boost motivation. Use positive affirmations to stay mentally strong. Engage in light physical activity to relieve stress. Prioritize self-care to maintain emotional balance. Stay hydrated and eat nutritious meals to support brain function. Create a peaceful study environment free from distractions. Regularly take short breaks to recharge and refocus. Remember, preparation is key to overcoming exam nerves.

Common Mistakes to Avoid

Avoid inadequate preparation and poor time management, as these are leading causes of exam failure. Ignoring practice exams and misunderstanding key concepts can hinder success. Stay vigilant and focused to prevent careless errors and ensure thorough preparation for all sections of the exam.

6.1. Inadequate Preparation and Time Management

Poor preparation and time mismanagement are leading causes of exam failure. Many candidates underestimate the exam’s difficulty, neglecting to study key topics or practice under timed conditions. Without a structured study plan, essential concepts may be overlooked. Additionally, rushing through questions or failing to allocate enough time for complex sections can lead to errors. Proper preparation and strategic time allocation are crucial for success. Avoid these common pitfalls to ensure a confident exam performance.

6.2. Overlooking Key Exam Rules and Regulations

Ignoring exam rules can lead to disqualification or delays. Candidates must review Pearson VUE’s policies, such as prohibited items and required documents. Familiarize yourself with test center protocols, like arrival times and ID requirements. Neglecting these details can cause unnecessary stress or even prevent you from taking the exam. Ensure compliance with all regulations to avoid issues on exam day and maintain a smooth testing experience.

Additional Resources for Exam Preparation

Utilize recommended study guides, online courses, and practice exams to enhance preparation. Joining study groups or forums can also provide valuable insights and support for success.

7.1. Recommended Study Guides and Online Courses

Invest in comprehensive study guides and online courses tailored for the Pearson VUE Real Estate Exam. Utilize resources like PVUE crash course videos and practice tests to familiarize yourself with exam content. Pearson VUE offers affordable practice exams for $19.95, covering essential topics. Additionally, structured courses designed specifically for licensure preparation provide in-depth insights and exam-focused content to enhance your readiness and confidence;

7.2. Benefits of Joining Study Groups or Forums

Joining study groups or forums enhances your preparation by connecting you with peers facing similar challenges. These platforms foster collaborative learning, allowing you to share insights, discuss difficult topics, and gain diverse perspectives. Additionally, they provide access to valuable resources, tips, and strategies from experienced candidates, helping you stay motivated and well-prepared for the exam. Active participation can significantly boost your confidence and understanding of key concepts.

Final Exam Day Checklist

Visit the Pearson VUE website to confirm your exam details, bring valid ID, arrive early, and ensure all required documents are ready for a smooth experience.

8.1. Documents and Materials Needed for the Exam

Ensure you bring a valid government-issued ID, your exam registration confirmation, and any additional documents required by your state. Avoid bringing prohibited items like phones or notes. Verify the exam location and time beforehand to avoid last-minute issues. Double-check all requirements to ensure compliance with Pearson VUE’s policies and regulations for a smooth exam experience.

8.2. Last-Minute Tips for Success

Stay calm and focused by arriving early to familiarize yourself with the test center. Skim through your notes one last time to reinforce key concepts. Manage your time wisely during the exam, answering easier questions first. Eliminate obvious wrong answers before guessing, and stay confident in your preparation. A positive mindset and strategic approach will help you perform at your best.

What to Expect After Passing the Exam

After passing the Pearson VUE Real Estate Exam, candidates receive their license, enabling them to practice real estate professionally. They must complete continuing education for renewal.

9.1. Licensing Process and Next Steps

After passing the exam, candidates submit their license application to the state real estate commission. This includes paying fees, providing required documents, and completing a background check. Once approved, the license is issued, allowing practice under a brokerage. Many states require post-licensing education within the first year to maintain active status. Staying updated on regulations and continuing education ensures long-term career success.

9.2. Maintaining and Renewing Your License

To maintain your real estate license, complete continuing education requirements, which vary by state. Renewal periods typically range from 2-4 years. Submit renewal fees and proof of completed courses on time. Stay updated on industry changes and ethical practices to uphold professionalism; Failure to renew may result in inactive status, requiring additional steps to reinstate your license and continue practicing.

Passing the Pearson VUE Real Estate Exam is a significant achievement, requiring dedication and persistence. Celebrate your success and embrace the opportunities ahead in your real estate career.

10.1. Final Motivation and Encouragement

Believe in yourself and your hard work—passing the Pearson VUE Real Estate Exam is a testament to your dedication. Celebrate your journey and stay confident in your abilities. This achievement is not just about passing a test; it’s about launching a rewarding career. Stay focused, embrace challenges, and remember, persistence leads to success. Go forward with determination and excitement for the opportunities ahead in the real estate field!

10.2. The Value of Persistence in Achieving Your Goal

Persistence is the cornerstone of success in passing the Pearson VUE Real Estate Exam. Every challenge overcome and every concept mastered brings you closer to your goal. Stay committed to your study plan and embrace setbacks as learning opportunities. Remember, perseverance builds resilience and confidence, which are essential for not only passing the exam but thriving in your real estate career. Keep pushing forward!

wow cata enchanting guide

Enchanting in WoW Cataclysm Classic empowers players to infuse gear with magical properties, enhancing stats and abilities. This guide covers everything from basics to advanced techniques, helping you master the profession and boost your character’s performance in Azeroth.

1.1 Importance of Enchanting in WoW Cataclysm

Enchanting is a vital profession in WoW Cataclysm, enabling players to enhance gear with powerful magical properties. It boosts stats like spellpower, agility, and stamina, improving performance in PvE and PvP. Unique enchants provide effects unavailable through other means, making it a cornerstone for optimizing gear. Additionally, the Blood Elf racial bonus (+10 enchanting skill) further highlights its importance for certain players.

1.2 Brief Overview of Enchanting Profession

Enchanting is a crafting profession that allows players to imbue weapons and armor with magical properties. It involves disenchanting items to acquire materials like dusts, essences, and shards, which are then used to create powerful enchants. This profession is essential for optimizing gear, offering unique enhancements that cannot be obtained through other means in the game.

Getting Started with Enchanting

Learn the basics of Enchanting, including race selection, finding trainers, and gathering initial materials. Understand the tools and techniques needed to begin crafting and disenchanting items effectively.

2.1 Choosing the Right Race for Enchanting

Blood Elves are ideal for Enchanting due to their Arcane Affinity, granting a +10 skill bonus. This allows recipes to stay orange longer, reducing material costs. Other races lack specific Enchanting bonuses, so choose based on personal preference or faction needs. Blood Elf advantage simplifies leveling but isn’t mandatory for success with proper planning and resource management.

2.2 Finding and Training Enchanting

To begin Enchanting, find a profession trainer in major cities like Stormwind or Orgrimmar. Speak to the Enchanting trainer, who will teach you the basics. Initial training costs gold, and you’ll need materials like Strange Dust and Lesser Magic Essence. Craft a Copper Rod early on to unlock higher-level recipes and start your Enchanting journey effectively.

2.3 Initial Materials and Tools Needed

Starting Enchanting requires basic materials like Strange Dust, Lesser Magic Essence, and Copper Rods. These can be purchased from the Auction House or crafted using Tailoring. Essential tools include an Enchanter’s Rod for casting spells and Enchanting Vellum for selling enchants. Gather these materials early to ensure efficient skill progression and minimize delays in crafting recipes.

Leveling Enchanting from 1 to 525

Leveling Enchanting from 1 to 525 requires crafting specific items at each skill stage, using materials like Strange Dust and Essences. This progression unlocks higher-tier recipes and enhances efficiency, allowing players to master the profession and create powerful enchants for gear optimization.

3.1 Leveling from 1 to 50 (Apprentice)

Begin by crafting a Runed Copper Rod, requiring 1 Copper Rod, 1 Strange Dust, and 1 Lesser Magic Essence. Proceed to enchant bracers with Minor Health, using 48 Strange Dust. This efficient method quickly progresses your skill, ensuring a solid foundation for higher-level enchanting. Focus on using inexpensive materials to minimize costs during this initial phase.

3.2 Leveling from 50 to 150 (Journeyman)

From 50 to 150, focus on crafting Enchant Bracer ⏤ Minor Health, requiring Strange Dust. Create 80 of these to reach 130, then switch to Enchant Cloak ‒ Minor Agility, using Lesser Magic Essence. Craft 20 of these to hit 150. This phase is cost-effective and sets you up for more complex enchants. Use Tailoring to craft items for disenchanting if needed.

3.3 Leveling from 150 to 225 (Expert)

From 150 to 225, craft Enchant Boots ⏤ Greater Stamina, requiring Greater Magic Essence. Make 40 of these to reach 190, then switch to Enchant Bracer ‒ Greater Intellect, using Dream Dust. Craft 35 of these to hit 225. This phase introduces higher-tier materials and more complex recipes, making it crucial to manage resources efficiently for optimal progression.

3.4 Leveling from 225 to 300 (Artisan)

From 225 to 300, craft Enchant Gloves ⏤ Greater Agility, using 20 Dream Dust and 20 Greater Magic Essence. Make 75 of these to reach 300. This phase introduces more advanced recipes, requiring higher-tier materials like Dream Dust. Focus on optimizing material use to minimize costs and ensure steady progression to Artisan level, unlocking specialized enchantments.

3.5 Leveling from 300 to 525 (Master and Illustrious Grand Master)

From 300 to 525, focus on crafting high-demand enchants like Enchant Boots ‒ Tuskarr’s Vitality and Enchant Chest ‒ Power of the Titans. Use Eternals and Crystallized elements to progress efficiently. At 400+, craft rare enchants requiring Dream Shards and Abyss Crystals. Optimize material use and consider Auction House purchases for hard-to-find components to reach the coveted 525 skill cap.

Blood Elf Enchanting Bonus

Blood Elves gain a +10 Enchanting skill bonus from their Arcane Affinity racial trait, allowing recipes to stay orange longer and enhancing crafting efficiency.

4.1 Understanding the +10 Enchanting Skill Bonus

Blood Elves’ Arcane Affinity grants a +10 Enchanting skill bonus, making recipes stay orange longer. This reduces material costs and allows learning higher-level enchants sooner, improving efficiency and gold-making potential significantly in Cataclysm Classic.

4.2 How to Utilize the Bonus Effectively

With the +10 bonus, Blood Elves can craft lower-level recipes longer, reducing material waste and gold spent on higher-level patterns. This allows mastering multiple enchants before progressing, enhancing versatility and profitability when selling services on the Auction House in Cataclysm Classic.

Types of Enchantments

Enchantments in WoW Cataclysm Classic enhance weapons, armor, and crafting tools. They provide magical effects, boosting stats like spellpower or stamina, and offer utility, such as increased movement speed or elemental resistance.

5.1 Weapon Enchantments

Weapon enchantments in WoW Cataclysm Classic boost offensive and defensive capabilities. Popular options include Major Spellpower, enhancing magical damage, and Crusader, providing healing and strength. These enchants are crafted using dusts, essences, and shards, offering significant improvements to DPS and survivability for both casters and melee classes.

5.2 Armor Enchantments

Armor enchantments in WoW Cataclysm Classic enhance defensive and utility stats. Popular options include Major Stamina for increased health, Major Agility for agility-based classes, and Spellpower for casters. These enchants are crafted using dusts and shards, providing significant survivability and versatility for tanks, healers, and DPS classes alike.

5.3 Crafting Enchantments

Crafting enchantments in WoW Cataclysm Classic involve creating enchanted items like wands or enchanted scrolls. These require rare materials such as essences and shards. Crafting enchants allows players to create gear with unique stats or effects, which can be used personally or sold on the Auction House for profit, making it a valuable skill for both gameplay and economy.

Essential Materials for Enchanting

Dusts, essences, and shards are core materials for enchanting, obtained through disenchanting gear. Rods and vellum are also vital for crafting and selling enchants, ensuring you have everything needed to progress in the profession.

6.1 Dusts, Essences, and Shards

Dusts, essences, and shards are vital materials obtained through disenchanting gear. Strange Dust and Lesser Magic Essence are common early materials, while higher-level items yield Shards and Crystals. These components are essential for crafting enchants and can be acquired through disenchanting or purchased from the Auction House. Stockpiling these materials will ensure seamless progression in your enchanting journey.

6.2 Rods and Other Crafting Tools

Enchanting requires specific tools like Runed Copper Rod, Runed Silver Rod, and Runed Gold Rod for higher-level enchants. These rods are crafted using metals and gems. Additionally, Enchanting Vellum is essential for creating scroll-based enchants to sell on the Auction House. These tools are crucial for advancing your enchanting skills and can be crafted or purchased from vendors. Always keep a stock of rods for efficient crafting.

Enchanting Recipes and Drops

Enchanting recipes are obtained through drops, quests, or vendors. Rare recipes can drop from dungeons or raids, offering unique enchants. Farming specific mobs or instances is often required to acquire elusive patterns, making them highly sought after by players seeking exclusive enhancements.

7.1 Rare and Hard-to-Find Recipes

Rare enchanting recipes can be challenging to obtain, often dropping from specific dungeon or raid bosses. These recipes provide unique and powerful enchants, such as Major Spellpower or Crusader Strike, making them highly valuable. Players may need to repeatedly farm certain instances or participate in raids to acquire these elusive patterns, which can significantly enhance their crafting capabilities and market demand.

7.2 Drops from Dungeons and Raids

Enchanting materials and rare recipes often drop from dungeon and raid bosses in Cataclysm Classic. These drops are essential for crafting powerful enchants and progressing your skill. Farming specific instances like Blackwing Lair or Uldaman can yield valuable components such as Essences and Shards, which are crucial for high-level enchantments. Consistent farming can help you acquire these valuable resources efficiently.

Using the Auction House for Materials

The Auction House is a key resource for acquiring rare enchanting materials. Check prices regularly, buy in bulk, and timing your purchases strategically to secure the best deals.

8.1 Efficient Material Shopping

Efficient material shopping involves checking Auction House prices regularly, buying in bulk, and timing purchases strategically. Use addons like Auctionator to track market trends and snag deals. Focus on essential materials like dusts, essences, and rods, ensuring you stockpile enough for your enchanting needs without overspending. This approach maximizes efficiency and saves gold.

8.2 Selling Enchants for Gold

Selling enchants on the Auction House can be lucrative. Focus on high-demand enchants for weapons and armor. Research prices to set competitive bids and buyouts. Consider crafting enchanting vellums for easy sales. Timing your listings during peak hours increases visibility. Specialize in popular enchants to attract consistent buyers and maximize gold earnings through strategic sales tactics.

High-End Enchantments

High-end enchantments in WoW Cataclysm are powerful enhancements for top-tier gear. They require rare materials and advanced skills, making them highly sought after for optimal performance.

9.1 Most Sought-After Enchants

In WoW Cataclysm Classic, high-end enchantments like Enchant Weapon ‒ Major Spellpower and Enchant Chest ⏤ Stamina are highly demanded for their significant stat boosts. These enchants, often requiring rare materials like Dragonseye or Essence of Destruction, provide substantial improvements to spell damage, stamina, or agility, making them essential for raiders and PvP players seeking optimal performance.

9.2 Crafting High-Level Enchants

Crafting high-level enchants in WoW Cataclysm Classic demands rare materials like Dragonseye and Abyss Crystal, often obtained from dungeons or raids. With a high Enchanting skill and proper recipes, players can create powerful enchants such as Enchant Weapon ⏤ Power or Enchant Cloak ‒ Greater Agility. Blood Elves benefit from their +10 skill bonus, making crafting easier and more profitable when selling on the Auction House.

Advanced Enchanting Techniques

Master disenchanting and vellum use for efficient material recycling and profitable enchant sales. Optimize your crafting and maximize gold income in WoW Cataclysm Classic.

10.1 Disenchanting Guide

Disenchanting allows you to break down unwanted gear into materials like dusts, essences, and shards. Use these components to craft powerful enchants. Focus on disenchanting uncommon (green) or rare (blue) items for higher-value materials. This process is crucial for leveling and crafting high-end enchants efficiently in WoW Cataclysm Classic, enhancing your profession’s profitability and versatility.

10.2 Using Enchanting Vellum

Enchanting Vellum allows players to create permanent enchantment scrolls. These scrolls can be sold on the Auction House or used to enchant your own gear. To use vellum, craft the desired enchant, then combine it with the vellum to create a scroll. This method simplifies trading enchants and maximizes profitability, making it a valuable tool for enchanters in WoW Cataclysm Classic.

Enchanting Trainers and Locations

Enchanting trainers are found in major cities like Stormwind and Orgrimmar. Alliance trainers are in Dalaran, while Horde trainers are in Thunder Bluff and other hubs, making them easily accessible for players to learn and master enchanting skills.

11.1 Horde Trainers

Horde players can find expert enchanting trainers in major hubs like Orgrimmar, Thunder Bluff, and Dalaran. These trainers offer comprehensive training, allowing players to unlock advanced enchanting techniques and recipes. Visiting them regularly ensures you stay updated on the latest skills and improvements for your profession. Their locations are convenient, making it easy to enhance your enchanting abilities.

11.2 Alliance Trainers

Alliance trainers are located in key cities such as Stormwind, Ironforge, and Dalaran. These skilled enchanters provide essential training, enabling players to master the profession. Regular visits ensure access to the latest enchanting recipes and techniques, helping Alliance players enhance their gear effectively and stay competitive in Azeroth’s challenging environments. Their expertise is crucial for skill progression.

Enchanting and Economy

Enchanting significantly impacts the in-game economy, as crafted enchants and materials drive supply and demand. Players can capitalize on this by producing high-demand items, ensuring steady gold income and market influence.

12.1 Making Gold with Enchanting

Enchanting offers lucrative gold-making opportunities by crafting high-demand enchants. Disenchanting unwanted gear provides materials for valuable recipes. Focus on popular enchants like weapon and armor enhancements, and utilize the Auction House to sell crafted items or raw materials. Blood Elf players can leverage their +10 enchanting bonus to reduce material costs, maximizing profit margins effectively.

12.2 Setting Up Your Enchanting Business

Establishing a successful enchanting business requires strategic planning. Start by stocking essential materials and timing your crafting to meet demand. Set competitive prices by monitoring Auction House trends. Offer custom enchantments for specific gear needs and advertise your services in trade chat or guild messages. Building a reputation for quality and reliability will attract repeat customers and expand your client base effectively.

Mastery of Cataclysm Enchanting requires patience and dedication. By following this guide, you’ll efficiently enhance gear, maximize profits, and unlock the full potential of your crafting skills.

13.1 Final Tips for Mastering Enchanting

To excel in Cataclysm Enchanting, stay updated on market demand, use disenchanting strategically, and craft high-demand enchants. Invest in quality materials, leverage your Blood Elf bonus if applicable, and regularly check the Auction House for profitable opportunities. Balance crafting and selling to maximize gold income and enhance your character’s gear effectively.

good sam dinghy towing guide 2023

Dinghy towing‚ also known as flat towing‚ allows RVers to tow a vehicle effortlessly. The Good Sam 2023 guide provides expert tips for a seamless experience.

Definition and Benefits of Dinghy Towing

Dinghy towing‚ also known as flat towing‚ involves towing a vehicle behind an RV using a tow bar‚ with all four wheels on the ground. This method is popular among RVers due to its convenience and versatility. It allows travelers to explore destinations without repeatedly setting up and breaking down camp. The Good Sam Dinghy Towing Guide 2023 highlights its benefits‚ including easy maneuverability‚ cost-effectiveness‚ and the ability to use the towed vehicle for local trips. It’s an ideal solution for RV enthusiasts seeking freedom and flexibility on the road.

Overview of the Good Sam Dinghy Towing Guide 2023

The Good Sam Dinghy Towing Guide 2023 is a comprehensive resource for RVers‚ offering detailed insights into flat towing. It provides a list of 2023 model year vehicles approved for dinghy towing‚ along with manufacturer guidelines and equipment recommendations. The guide also covers essential safety tips‚ towing laws‚ and best practices for a hassle-free experience. Whether you’re a seasoned RVer or a newcomer‚ this guide serves as a go-to reference for mastering the art of dinghy towing and ensuring a safe‚ enjoyable journey.

Essential Equipment for Dinghy Towing

A reliable tow bar‚ hitch‚ and wiring harness are vital for safe dinghy towing. Braking systems and safety accessories ensure control and visibility‚ as outlined in the guide.

Types of Tow Bars and Harnesses

Choosing the right tow bar and harness is crucial for dinghy towing. The Good Sam 2023 guide highlights fixed‚ adjustable‚ and motorhome-mounted tow bars‚ each offering unique benefits. Wiring harnesses ensure proper lighting and braking communication between vehicles. The guide also covers supplemental braking systems and electronic controls for enhanced safety. Properly matching equipment to your RV and dinghy vehicle is essential for a secure and stable towing experience. The guide provides detailed compatibility charts to help RVers make informed decisions.

Braking Systems and Safety Accessories

Braking systems are a critical component of dinghy towing‚ ensuring safety and control. The Good Sam 2023 guide emphasizes the importance of supplemental braking systems‚ such as portable brakes or electronic controllers‚ to prevent wear on your RV and dinghy vehicle. Safety accessories like breakaway switches and emergency braking systems are also essential. These components ensure the towed vehicle stops safely in case of separation. Proper installation and maintenance of these systems are stressed in the guide to prevent accidents and enhance towing confidence.

Vehicle Compatibility and Manufacturer Guidelines

The Good Sam 2023 guide helps identify vehicles compatible with dinghy towing‚ emphasizing manufacturer guidelines to ensure safe towing without modifications or damage.

How to Determine if Your Vehicle is Suitable for Dinghy Towing

To determine if your vehicle is suitable for dinghy towing‚ consult your owner’s manual for manufacturer-approved flat towing capabilities. Check the vehicle’s curb weight‚ transmission type‚ and ensure it meets RV towing capacity. Additionally‚ review the Good Sam 2023 guide for a comprehensive list of compatible vehicles‚ ensuring adherence to manufacturer guidelines for safe towing without damage. Proper preparation and compliance with these standards are essential for a secure and efficient towing experience.

2023 Model Year Vehicles Approved for Flat Towing

The Good Sam 2023 Dinghy Towing Guide provides a detailed list of 2023 model year vehicles approved for flat towing. Popular models include Ford‚ Chevrolet‚ and Jeep vehicles‚ with specific trim levels and configurations highlighted. Each entry includes curb weight‚ towing capacity‚ and manufacturer recommendations. The guide ensures compatibility with RV towing systems‚ offering a reliable resource for RVers. Always verify the guide for accurate and updated information before selecting a vehicle for dinghy towing.

Safety Precautions and Best Practices

Always follow manufacturer guidelines and maintain safe speeds. Regularly inspect towing equipment and ensure proper vehicle setup. Practice towing in controlled environments before long trips.

Preparing Your Vehicle for Towing

Proper preparation is crucial for safe dinghy towing. Always consult your vehicle’s manual to ensure compliance with manufacturer guidelines. Run the engine periodically to maintain transmission health. Avoid using grille-mounted shields that may restrict airflow. Secure all loose items and ensure the tow bar is properly attached. Double-check braking systems and tire pressure before departure. Practice towing in a controlled environment to build confidence and skill; Regular maintenance and inspections are essential to prevent issues on the road.

On-the-Road Safety Tips and Procedures

While towing‚ maintain a safe speed and increase following distance to allow for longer stopping times. Always use extended mirrors for better visibility of the dinghy vehicle. If your vehicle loses traction or sways‚ gently reduce speed without braking hard. In case of an emergency‚ pull over safely and disconnect the tow bar if necessary. Regularly check tow bar and brake connections during stops. Avoid sudden maneuvers and ensure all lights on the towed vehicle are functional. Stay alert and follow all traffic laws to ensure a safe towing experience.

Legal and Regulatory Considerations

Understand state-specific towing laws and regulations. Ensure compliance with weight limits‚ lighting requirements‚ and braking standards. The Good Sam 2023 guide provides clarity on legal expectations for safe towing practices nationwide.

Towing Laws and Regulations by State

State-specific towing laws vary significantly‚ requiring careful adherence. Weight limits‚ speed restrictions‚ and equipment standards differ across jurisdictions. The Good Sam 2023 guide details these regulations‚ ensuring compliance. Some states mandate additional lighting or braking systems‚ while others enforce strict towing speed limits. It is crucial to research and understand local laws before embarking on a trip. Failure to comply can result in fines or safety hazards. Always cross-reference the guide with local DMV rules for a trouble-free towing experience.

Insurance and Liability Coverage for Dinghy Towing

Ensuring proper insurance and liability coverage is essential for dinghy towing. The Good Sam 2023 guide emphasizes the importance of verifying that both your RV and towed vehicle are adequately insured. Liability coverage must extend to the dinghy vehicle while towing. Additionally‚ consider supplemental insurance options like roadside assistance and collision coverage specific to towing scenarios. It is crucial to review your policy to avoid gaps in coverage. Always consult with your insurance provider to tailor your plan for safe and legal dinghy towing operations.

Troubleshooting Common Issues

Identify and address issues like transmission concerns‚ engine strain‚ or braking system malfunctions early. Regular maintenance and consulting the Good Sam guide can help resolve towing problems effectively.

Addressing Transmission and Engine Concerns

Transmission and engine issues are common challenges in dinghy towing. The Good Sam guide emphasizes monitoring transmission temperatures and avoiding excessive speeds. Running the engine periodically‚ as outlined in the guide‚ helps maintain proper lubrication. Ensuring your vehicle is tow-ready with manufacturer-approved settings is crucial. Regular maintenance‚ such as fluid checks‚ can prevent overheating and damage. Always follow the guide’s recommendations for specific vehicle models to avoid long-term engine strain. Proper preparation and adherence to guidelines ensure a smooth towing experience without risking your vehicle’s health.

Solving Common Problems During Towing

Common issues during dinghy towing include transmission overheating‚ engine stalling‚ and improper braking. The Good Sam guide recommends checking tow bar connections and ensuring proper vehicle leveling. If the transmission overheats‚ stop and let it cool. For engine stalling‚ restart the vehicle and ensure it’s in the correct towing mode. Brake issues may require adjusting the supplemental braking system. Regular inspections and adhering to manufacturer guidelines can prevent most problems. Always consult the guide for specific troubleshooting steps to ensure a safe and smooth towing experience.

Dinghy towing simplifies RV travel‚ offering freedom to explore with a reliable vehicle. The Good Sam 2023 guide ensures a safe‚ enjoyable experience with expert advice.

Final Tips for a Successful Dinghy Towing Experience

For a smooth and enjoyable dinghy towing experience‚ ensure your setup is properly configured and regularly inspected. Always consult your vehicle’s manual for towing instructions and follow the Good Sam 2023 guide’s recommendations. Perform pre-trip checks on the tow bar‚ braking system‚ and vehicle connections. Maintain a safe speed‚ ideally below 65 MPH‚ to reduce wear and tear; Practice towing in an empty parking lot to build confidence. Finally‚ stay informed about updates and manufacturer guidelines to ensure a safe and hassle-free adventure.

hotel channel guide

A hotel channel guide is a strategic tool enabling properties to manage distribution channels effectively. It helps maximize visibility, revenue, and operational efficiency across various booking platforms.

1.1 Definition and Purpose of a Hotel Channel Guide

A hotel channel guide is a comprehensive tool that lists all distribution channels available for booking. Its primary purpose is to enhance visibility and efficiency, ensuring consistent rates and availability across platforms. By managing these channels effectively, hotels can maximize revenue, streamline operations, and improve customer satisfaction and ensure a seamless guest experience.

1.2 Importance of Channel Guides in the Hospitality Industry

Channel guides are essential for hotels to maximize visibility, efficiency, and revenue. They ensure consistent rates and availability across platforms, preventing overbooking and revenue loss. By optimizing distribution channels, hotels can enhance customer satisfaction, streamline operations, and maintain a competitive edge in the dynamic hospitality industry, ultimately driving long-term success and growth.

Key Distribution Channels for Hotels

Hotels utilize direct bookings, OTAs, GDS, and meta-search engines to enhance reach and efficiency, ensuring seamless customer interactions and optimized revenue streams across diverse platforms.

2.1 Direct Bookings and Official Hotel Websites

Direct bookings via official hotel websites are crucial for maximizing profitability and guest loyalty. They allow hotels to showcase unique offerings, bypass commission fees, and maintain direct customer relationships. Personalized experiences and exclusive deals often incentivize guests to book directly, fostering brand loyalty and higher revenue retention compared to third-party platforms.

2.2 Online Travel Agencies (OTAs)

Online Travel Agencies (OTAs) like Expedia, Booking.com, and Airbnb are powerful platforms for hotels to reach a vast audience. They offer convenience for travelers to compare prices and book accommodations. While OTAs increase visibility, hotels pay commission fees for each booking. Effective OTA management is crucial to balance visibility and profitability, ensuring competitive rates and accurate inventory across platforms.

2.3 Global Distribution Systems (GDS)

Global Distribution Systems (GDS) connect hotels to travel agents, corporations, and travelers worldwide. These platforms enable real-time booking, rate management, and inventory updates. GDS platforms like Sabre, Amadeus, and Galileo are crucial for hotels to reach business travelers and large travel agencies, ensuring broader market exposure. However, hotels must manage associated fees and ensure rate parity across all distribution channels to maximize profitability and efficiency.

2.4 Meta-Search Engines

Meta-search engines like Google Hotel Search, Trivago, and Kayak aggregate hotel listings from multiple sources, allowing users to compare prices and options. These platforms enhance visibility for hotels, driving traffic to their websites or OTAs. They are essential for attracting price-sensitive travelers and maximizing reach, though hotels must optimize their listings and rates to stand out in competitive search results effectively.

Managing Hotel Channel Guide Effectively

Effective management of a hotel channel guide involves using tools like CMS, ensuring rate parity, and optimizing content to maximize bookings and revenue across all distribution channels seamlessly.

3.1 Channel Management Systems (CMS)

A Channel Management System (CMS) is a crucial tool for hotels to efficiently manage their distribution channels. It allows real-time updates of room availability and rates across multiple platforms, including OTAs, GDS, and direct booking systems. By automating inventory and rate adjustments, CMS reduces overbooking risks and ensures consistency. It also integrates with PMS, enhancing operational efficiency and enabling hotels to maximize revenue through optimized distribution strategies.

3.2 Rate Parity and Inventory Management

Rate parity ensures consistent pricing across all distribution channels, preventing undercutting and maintaining customer trust. Effective inventory management balances room availability with demand, optimizing occupancy and revenue. Hotels employ strategies like overbooking and last-minute deals while monitoring channel performance to adjust rates dynamically, ensuring competitive pricing without compromising profitability.

3.3 Content Optimization for Channels

Optimizing content for each channel ensures hotel listings attract target audiences. Tailor descriptions, images, and keywords to match platform-specific demographics; High-quality visuals and detailed amenities enhance appeal, driving engagement and bookings. Regularly updating content based on analytics and guest feedback ensures relevance and competitiveness, improving conversion rates across all distribution channels.

Strategies for Maximizing Revenue Through Channel Guide

Implement dynamic pricing, targeted marketing, and leverage customer feedback to optimize revenue. Analyze channel performance and adjust strategies to maximize bookings and profitability across all platforms.

4.1 Dynamic Pricing and Yield Management

Dynamic pricing adjusts room rates in real-time based on demand, ensuring hotels maximize revenue. Yield management optimizes inventory allocation and pricing to balance occupancy and profitability. Together, they analyze market trends, competitor rates, and guest behavior to set competitive prices, enhancing revenue performance while maintaining guest satisfaction and perceived value.

4.2 Targeted Marketing Across Channels

Targeted marketing involves tailoring campaigns to specific audience segments across distribution channels. Hotels analyze customer data to create personalized offers, improving engagement and conversions. By aligning messaging with channel-specific demographics, hotels enhance brand visibility and appeal, ensuring consistent and relevant communication that drives bookings and loyalty across diverse platforms like OTAs, social media, and direct websites.

4.3 Leveraging Customer Feedback

Leveraging customer feedback is crucial for refining hotel services and enhancing guest experiences. Hotels collect feedback through surveys, reviews, and social media, analyzing it to identify strengths and areas for improvement. By addressing concerns and highlighting positive aspects, hotels can tailor marketing strategies, improve operational efficiency, and build stronger customer relationships, ultimately driving loyalty and repeat bookings.

Challenges in Hotel Channel Management

Managing multiple distribution channels, ensuring rate parity, and adapting to technological advancements are significant challenges hotels face in maintaining effective channel management strategies.

5.1 Overcoming Fragmentation Across Channels

Fragmentation across channels creates complexity in managing bookings, rates, and inventory. Hotels must integrate technology and standardize processes to ensure consistency. Real-time monitoring and automation tools help synchronize data, reducing errors and improving efficiency. By centralizing management, hotels can better allocate resources and deliver a seamless guest experience across all platforms.

5.2 Managing Competing Interests of Different Channels

Each channel has distinct priorities and commission structures, often leading to conflicts. Hotels must balance direct bookings with OTA demands while maintaining rate parity. By setting clear distribution strategies and using channel managers, hotels can align their goals with channel objectives. Regular performance analysis ensures optimal allocation of inventory and rates, fostering harmony among diverse platforms and maximizing revenue potential.

5.3 Adapting to Technological Advancements

Hotels must embrace emerging technologies like AI and machine learning to optimize channel management. Dynamic pricing tools and blockchain integration enhance efficiency and security. Staying updated with tech trends ensures competitiveness and seamless guest experiences, while automation streamlines operations across multiple platforms, fostering innovation and adaptability in a rapidly evolving industry landscape.

Case Studies and Success Stories

Real-world examples highlight hotels that optimized distribution channels, boosting revenue and operational efficiency.Luxury and budget hotels share strategies that drove success and enhanced guest satisfaction.

6.1 Effective Channel Management in Luxury Hotels

Luxury hotels excel by using dynamic pricing and exclusive partnerships with high-end OTAs. They leverage personalized marketing to attract affluent travelers, ensuring rate parity and inventory alignment. A unified CMS streamlines operations, enabling real-time adjustments. These strategies enhance guest experience, driving loyalty and maximizing revenue through targeted, high-yield channels.

6.2 Budget Hotels and Their Channel Strategies

Budget hotels focus on cost-effective distribution strategies, prioritizing direct bookings and partnerships with popular OTAs. They optimize listings with clear, concise content to attract price-sensitive travelers. By maintaining rate consistency and leveraging meta-search engines, budget hotels maximize occupancy without compromising profitability, ensuring a competitive edge in the affordable accommodation market.

Future Trends in Hotel Channel Guide

The future of hotel channel guides lies in seamless integration of emerging technologies and data-driven strategies to enhance guest experiences and optimize revenue streams efficiently.

7.1 Role of Artificial Intelligence (AI)

AI is revolutionizing hotel channel management by optimizing pricing, automating tasks, and enhancing guest experiences. It analyzes data to predict demand, personalize offers, and improve booking processes, ensuring hotels maximize revenue and operational efficiency while delivering tailored services to guests.

7.2 Integration of Blockchain Technology

Blockchain technology enhances security and transparency in hotel channel management. It ensures secure transactions, reduces fraud risks, and streamlines booking processes. By decentralizing data, blockchain improves inventory management and rate parity, fostering trust between hotels and guests while minimizing errors and disputes in real-time.

7.3 Personalization and Guest Experience

Personalization and guest experience are crucial for modern hospitality. Hotels leverage data analytics to tailor services, offering customized packages and preferences; Advanced systems enable real-time feedback, improving service quality. By integrating AI-driven insights, hotels create unique, memorable stays, enhancing loyalty and satisfaction while meeting evolving traveler expectations for personalized and seamless experiences.

Tools and Software for Hotel Channel Management

Effective hotel channel management relies on advanced tools like Channel Management Systems (CMS) and Property Management Systems (PMS). These platforms streamline inventory, rates, and bookings across channels, ensuring efficiency and consistency.

8.1 Popular Channel Management Systems

Popular channel management systems include SiteMinder, Sabre, and Amadeus. These platforms offer real-time updates, synchronized inventory, and automated pricing adjustments across multiple booking channels. They integrate seamlessly with Property Management Systems (PMS) and Customer Relationship Management (CRM) tools, enhancing operational efficiency and revenue optimization for hotels of all sizes.

8.2 CRM and PMS Integration

Integrating CRM (Customer Relationship Management) and PMS (Property Management System) enhances hotel operations by syncing guest data, preferences, and booking details. This integration automates tasks, improves personalized service, and provides actionable insights, enabling hotels to deliver tailored experiences and make data-driven decisions while maintaining seamless communication across all departments.

pandigital photo frame user guide

Welcome to the Pandigital Photo Frame user guide! This guide helps you get started with your digital photo frame, ensuring a seamless and enjoyable experience. Learn how to set up, navigate, and make the most of its features to display your cherished memories effortlessly.

Safety Precautions

To ensure safe and proper use of your Pandigital Photo Frame, follow these guidelines:

  • Avoid exposing the frame to water or extreme humidity, as this may damage internal components;
  • Use a soft, dry cloth to clean the frame and screen; avoid harsh chemicals or abrasive materials.
  • Do not insert sharp objects into the memory card slots or other openings.
  • Keep the frame out of reach of children to prevent accidental damage or injury.
  • Disconnect the power cord during storms or when not in use for extended periods.
  • Ensure the frame is placed on a stable surface to prevent tipping over.
  • Follow the manufacturer’s instructions for powering on and off to avoid electrical issues.

Adhering to these precautions will help maintain your photo frame’s performance and longevity while ensuring user safety.

What’s in the Box

Your Pandigital Photo Frame package includes everything you need to get started:

  • The digital photo frame with a high-resolution display.
  • A remote control for easy navigation and feature access.
  • A power adapter to connect the frame to a power source.
  • A USB cable for transferring photos from your computer.
  • A stand or mounting hardware for stable placement.
  • A user manual or quick-start guide with setup instructions.
  • Additional items like memory cards or adapters may be included, depending on the model.

Ensure all items are accounted for before proceeding with setup to ensure a smooth experience. If any components are missing, contact customer support for assistance.

Setting Up Your Pandigital Photo Frame

Unpack and plug in your Pandigital Photo Frame, insert memory cards, and power it on. Use the remote to navigate settings and start your photo slide show immediately.

Connecting the Frame

To connect your Pandigital Photo Frame, begin by inserting a memory card into the designated slot on the side of the frame. Ensure the card clicks securely into place; Next, plug in the power cable to an electrical outlet and turn on the frame using the power switch located on the back. The frame will automatically detect the memory card and start a slideshow of your photos. If you prefer to display photos individually, press the Exit button to access the Thumbnails Screen. Use the Up and Down arrows on the remote or frame controls to select a photo, then press the Play button to view it. This setup ensures your photos are easily accessible and displayed in a seamless manner.

Inserting Memory Cards

To insert a memory card into your Pandigital Photo Frame, locate the memory card slot on the side or back of the frame. Ensure the frame is powered off before inserting the card to avoid any potential issues. Gently push the memory card into the slot until it clicks into place, ensuring it is securely seated. The frame supports various memory card formats, such as SD, SDHC, and CF cards. Once the card is inserted, turn the power switch on, and the frame will automatically detect the card and begin a slideshow of your photos. If the frame does not recognize the card, check that it is fully inserted and compatible with the frame. For optimal performance, ensure the memory card is free from dust and moisture.

Powering On the Frame

To power on your Pandigital Photo Frame, locate the power switch on the back or bottom of the device. Flip the switch to the “ON” position. The frame will automatically power up and initiate a slideshow of the photos stored on the inserted memory card. Ensure the frame is properly plugged into a working electrical outlet. If the frame does not turn on, check the power cord connection and verify that the outlet is functioning. Once powered on, the frame will display a start-up screen before transitioning into the slideshow mode. Allow a few seconds for the interface to load fully. If you experience any issues, refer to the troubleshooting section of the manual or reset the frame by unplugging and replugging it. Proper power-up ensures smooth operation and optimal performance of your photo frame.

Basic Operations

Master the essentials of your Pandigital Photo Frame, including navigating the interface, using the remote control, starting a slideshow, and managing photos. Refer to specific sections for detailed guidance.

Navigating the Interface

Navigating your Pandigital Photo Frame is straightforward and intuitive. The interface is designed to be user-friendly, allowing you to easily access and manage your photos. Use the remote control to navigate through the menu options, where you can view photos, adjust settings, and customize your display. The frame features a clear and organized layout, with options such as slideshow playback, photo rotation, and display settings readily accessible. To move through the menu, use the arrow keys on the remote, and press the Enter button to select an option. The Home screen provides quick access to key features, ensuring you can enjoy your photos without unnecessary complexity. For more detailed navigation, refer to the remote control guide or the on-screen instructions. This interface ensures a seamless experience for managing and enjoying your digital memories.

Using the Remote Control

The remote control is an essential tool for operating your Pandigital Photo Frame. It allows you to navigate menus, select options, and adjust settings without touching the frame itself. The remote typically includes buttons for menu navigation, such as up, down, left, and right arrows, as well as an Enter or OK button to confirm selections. Additional buttons may be available for functions like zoom, rotate, and slideshow controls. To use the remote effectively, ensure it is pointed directly at the frame’s infrared sensor. Replace batteries if the remote becomes unresponsive. Some users have noted that the remote can be sluggish, so press buttons firmly and allow a moment for commands to register. This ensures smooth operation and enhances your overall user experience with the Pandigital Photo Frame. Always refer to the remote guide for specific button functions and troubleshooting tips.

Playing a Slide Show

To start a slide show on your Pandigital Photo Frame, simply insert a memory card with photos or connect via USB, and the frame will automatically begin displaying images. You can customize the slide show by adjusting settings such as the display duration for each photo, transition effects, and whether to shuffle images. Use the remote control to pause, resume, or skip photos during playback. For a more personalized experience, navigate to the settings menu and select your preferred slide show options. Ensure the frame is powered on and the memory card is properly inserted for seamless playback. The default display time is typically 5 seconds per photo, but this can be adjusted to suit your preferences. This feature allows you to enjoy your photos effortlessly, creating a dynamic and engaging display of your memories.

Advanced Features

Explore advanced functionalities like zooming and rotating photos for optimal viewing. Customize display settings to enhance image quality and personalize your slide shows with transitions and effects.

Zooming and Rotating Photos

Enhance your viewing experience by zooming in on details or rotating images for proper orientation. To zoom, press the zoom button on the remote repeatedly until reaching your desired level. For rotating, select the photo you wish to adjust and use the rotate button to turn it clockwise or counterclockwise. This feature ensures every image is displayed perfectly, whether it’s a portrait or landscape shot. You can also access these options from the photo thumbnails screen by selecting the image and using the corresponding buttons. After making adjustments, resume your slide show seamlessly with the slideshow button. This functionality allows you to customize how each photo is displayed, ensuring optimal viewing pleasure for all your memories.

Customizing Display Settings

Personalize your viewing experience by adjusting various display settings on your Pandigital Photo Frame. You can customize the slide show timing, selecting intervals from 5 seconds to several minutes, ensuring photos are displayed at your preferred pace. Transition effects between images can also be tailored, offering options like fade, slide, or no transition for a seamless or dynamic presentation. Additionally, brightness and contrast settings can be adjusted to optimize image quality based on your viewing environment. The frame also supports aspect ratio adjustments, ensuring photos fit the screen perfectly without distortion; Access these settings through the menu, using the remote or control buttons for easy navigation. By customizing these options, you can enhance your photo display experience and ensure your memories look their absolute best on the frame.

Managing Your Photos

Easily organize and upload photos to your Pandigital Photo Frame using memory cards or USB connections. Supported formats include JPEG, ensuring compatibility and seamless display of your memories.

Uploading Photos

Uploading photos to your Pandigital Photo Frame is a straightforward process. You can transfer images directly from your camera, computer, or via USB flash drives. Ensure your photos are in supported formats like JPEG for compatibility. Inserting a memory card or connecting a USB device automatically triggers the frame to recognize and display your photos. For optimal performance, organize your photos into folders before transferring, as the frame will automatically create a slideshow from the uploaded content. Avoid using overly large files to maintain smooth navigation and display. If uploading from a computer, use the provided USB cable to ensure a stable connection. Once uploaded, your photos will be ready to view, either individually or in a slideshow format, enhancing your viewing experience with minimal effort required.

Organizing Albums

Organizing albums on your Pandigital Photo Frame is an efficient way to manage and enjoy your photos. Start by creating folders on your memory card or USB device before inserting it into the frame. Name the folders clearly to categorize events or dates, making it easier to navigate through your collection. Once the frame detects the folders, it will automatically generate a slideshow for each album. For optimal organization, ensure your photos are saved in supported formats like JPEG. Avoid overloading a single folder with too many images, as this may slow down navigation. Use the remote control to sort or rename albums directly on the frame. This feature allows you to customize your photo collection, ensuring a seamless and organized viewing experience. Regularly updating and organizing your albums will help you enjoy your memories more efficiently.

Page 1 of 3

Powered by WordPress & Theme by Anders Norén