Remote Starters on Manual Transmission Vehicles: A Comprehensive Guide
Navigating the complexities of adding remote starters to manual transmission vehicles demands a thorough understanding of safety, liability, and specific system requirements.
Understanding the Core Challenge: Safety Concerns
The primary hurdle in equipping a manual transmission vehicle with a remote starter revolves around inherent safety risks. Unlike automatics, manuals can readily move if not properly secured. The significant concern is the potential for unintended vehicle movement if the car is left in gear during remote activation.

This poses a severe hazard, potentially leading to property damage, injury, or even fatalities – a scenario installers understandably fear, creating substantial liability. Discussions on platforms like Reddit highlight this risk vividly, emphasizing the catastrophic consequences of a vehicle unexpectedly starting and rolling. Therefore, any remote start solution must guarantee the vehicle is in neutral with the parking brake engaged to mitigate these dangers effectively.
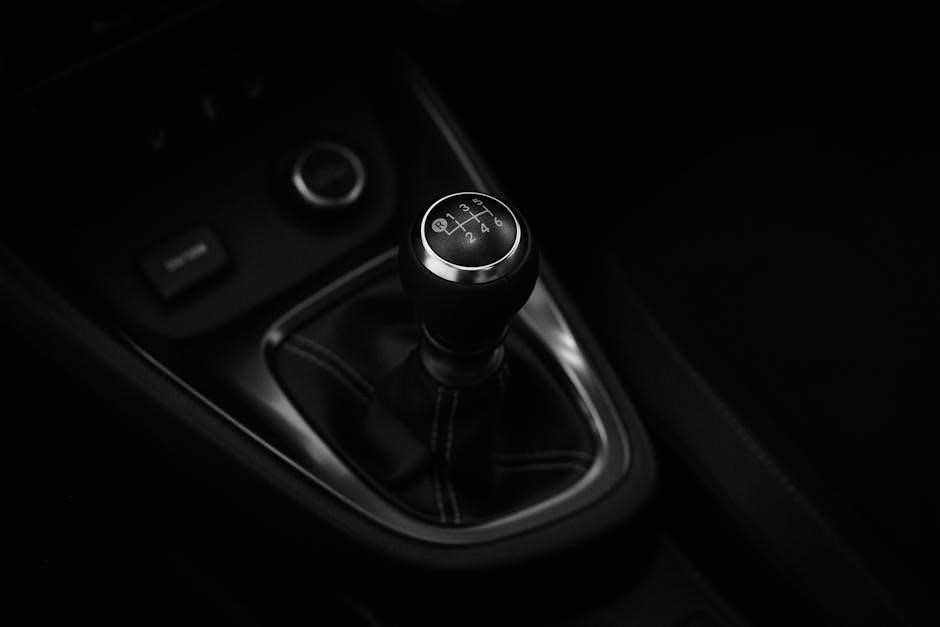
The Clutch Safety Switch and Why It Matters
The clutch safety switch is a crucial component designed to prevent the engine from starting unless the clutch pedal is fully depressed. This feature is standard on manual transmission vehicles, acting as a vital safeguard against accidental engagement of gears. However, installing a remote starter necessitates addressing this switch, as the clutch won’t be pressed during remote activation.
Bypassing this switch is often discussed as a relatively simple procedure, but it’s precisely this ease of circumvention that raises significant liability concerns for installers. Removing its protection opens the door to the dangerous scenarios previously mentioned. Therefore, any successful remote start implementation on a manual requires a system that reliably confirms the vehicle is in neutral, effectively replicating the safety function of the clutch switch.
Liability Issues for Installers
The potential for catastrophic accidents creates substantial liability risks for anyone installing a remote starter on a manual transmission vehicle. The core concern revolves around the possibility of the vehicle starting in gear, leading to unintended movement and potential harm to people or property. As one dealer stated, the scenario of a vehicle “mowing someone down” is a very real fear.
This risk is so significant that many installers, and even dealerships, actively avoid these installations. Dealers specifically remove existing remote starts from manual transmission cars upon intake, refusing to install them for customers. The legal ramifications of a remote start malfunction resulting in injury or damage could be severe, encompassing lawsuits and significant financial penalties. Consequently, installers face a difficult decision balancing customer requests with their own legal exposure.
Is Remote Start Even Possible on a Manual?
Initially, the consensus was a firm “no” – remote starting a manual transmission vehicle seemed impossible due to inherent safety concerns. Many believed the clutch safety switch made it an insurmountable obstacle. However, recent information challenges this long-held belief. Compustar, a prominent remote start manufacturer, has published information suggesting it is possible to successfully install a remote start system on a manual transmission vehicle.
This possibility hinges on overcoming the safety mechanisms designed to prevent unintended starts. It’s not a simple plug-and-play process; it requires specific procedures and, often, bypassing the clutch safety switch. While achievable, it demands careful consideration and a thorough understanding of the vehicle’s systems. The question has shifted from “can it be done?” to “how can it be done safely?”
Compustar and Manual Transmission Compatibility
Compustar has emerged as a key player in enabling remote start functionality for manual transmission vehicles, directly addressing a previously unmet need in the aftermarket. Their published blog posts and system designs demonstrate a commitment to providing solutions where others hesitate due to liability concerns. Compustar systems aren’t universally compatible “out of the box” with manuals; specific programming and often, a bypass of the clutch safety switch, are required.
However, Compustar offers the necessary technology and, crucially, provides guidance for installers. Their approach focuses on ensuring the vehicle is in a safe state – neutral with the parking brake engaged – before allowing a remote start. This proactive stance has positioned them as a leader in this niche market, offering a viable path for manual transmission owners seeking the convenience of remote starting.
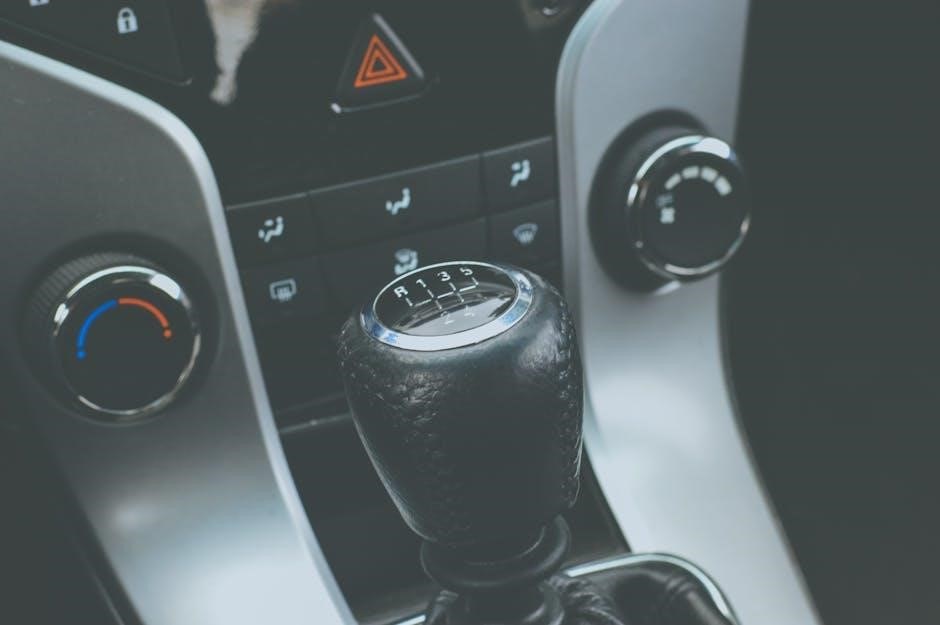
The Required Procedure: Neutral Position
A fundamental prerequisite for successfully and safely remote starting a manual transmission vehicle is ensuring it’s in neutral. This isn’t merely a suggestion; it’s a non-negotiable safety measure to prevent unintended vehicle movement. Remote start systems designed for manuals, like those from Compustar, rely on this condition being met before initiating the engine.
The system won’t activate if the vehicle is in gear. Users must consistently shift the car into neutral before activating the remote start. While it becomes routine with practice, this adds a deliberate step – approximately 20 to 30 seconds – to the typical shut-off procedure. This deliberate action reinforces safety and mitigates the risk of accidental engagement of a gear during remote start.
Parking Brake Engagement – A Critical Step
Alongside verifying the neutral position, firmly engaging the parking brake is absolutely crucial when utilizing a remote start system on a manual transmission vehicle. This dual-safety measure provides a redundant layer of protection against unintended movement. Even in neutral, a slight incline could allow the vehicle to roll, creating a hazardous situation.
The parking brake must be fully applied before attempting to remote start. Systems are designed with this expectation, and failure to engage it could prevent the system from functioning or, worse, allow a start attempt with insufficient restraint. This practice is paramount, given the liability concerns installers face – a rolling or moving vehicle during remote start is a significant risk.
The Extra Time Factor: Shut-Off Procedure Adjustment
Integrating a remote start into a manual transmission vehicle necessitates an adjustment to the standard shut-off procedure, adding approximately 20 to 30 seconds to the process. This delay isn’t a system flaw, but a deliberate safety feature built into the programming. The system requires this extra time to ensure the vehicle remains safely immobilized after the remote start sequence concludes.
Users will quickly adapt to this slightly extended shut-down, understanding it’s a necessary component of the system’s operation. This adjustment allows the vehicle to fully disengage and prevents any unexpected movement upon remote start activation. It’s a small inconvenience for a significant increase in safety and peace of mind, particularly given the inherent risks associated with manual transmissions.
Bypassing the Clutch Safety Switch: Risks and Considerations
While technically feasible, bypassing the clutch safety switch to enable remote start on a manual transmission vehicle introduces substantial risks and legal concerns. The switch exists to prevent the engine from starting if the vehicle isn’t in neutral or the parking brake isn’t engaged, safeguarding against unintended movement.
Circumventing this safety measure dramatically increases liability for installers. A scenario where a remotely started vehicle in gear causes damage or injury is a serious legal threat. Consequently, many dealerships and installers refuse this modification. Though seemingly simple, the potential consequences – including severe accidents and lawsuits – far outweigh any convenience gained. It’s a practice strongly discouraged due to the inherent dangers involved.
Potential Hazards: Unintended Vehicle Movement
The most significant hazard associated with remote starting a manual transmission vehicle is the potential for unintended movement. If the vehicle isn’t securely in neutral with the parking brake firmly engaged, a remotely started engine can result in the car rolling or lurching forward or backward.
This poses a severe risk of property damage, personal injury, or even fatalities. Even on a seemingly level surface, a slight incline can cause movement. The bypass of the clutch safety switch, often required for installation, exacerbates this danger. The possibility of the vehicle “mowing someone down,” as highlighted in online discussions, underscores the gravity of the situation. Vigilance and proper procedure are paramount, but the risk remains substantial.
Legal Implications of Modification
Modifying a vehicle’s safety systems, such as bypassing the clutch safety switch for remote start installation, carries potential legal ramifications. While not explicitly illegal in many jurisdictions, installers face significant liability if the modification contributes to an accident. Dealers, particularly, are cautious, often removing existing remote starts from manual transmission vehicles to avoid legal exposure.

If an accident occurs due to unintended vehicle movement after a remote start installation, the installer could be held responsible for damages and injuries. Vehicle owners may also face legal challenges, especially if the modification violates local safety regulations or voids the vehicle’s warranty. Thorough documentation of the installation process and a clear disclaimer of liability are crucial, but don’t eliminate the risk.
Remote Start Systems Specifically Designed for Manuals
While traditionally challenging, the market is slowly evolving to offer remote start systems tailored for manual transmission vehicles. Compustar, a prominent brand, has acknowledged the possibility and provides information on compatible installations, though often requiring specific procedures and hardware. These systems aren’t “plug-and-play” like those for automatics; they necessitate a more complex setup.
These specialized systems typically incorporate features to verify the vehicle is in neutral with the parking brake engaged before initiating the start sequence. They often require a longer shut-off procedure to ensure safety protocols are met. Availability remains limited, and professional installation is strongly recommended to guarantee proper functionality and minimize potential hazards. Finding these systems requires dedicated searching.
Aftermarket Options and Their Features
The aftermarket presents a range of remote start options, but compatibility with manual transmissions varies significantly. Many standard systems require bypassing the clutch safety switch, a practice discouraged by installers due to liability concerns. Systems offering integration with a neutral safety switch, or those allowing for customized start-up sequences, are preferable.
Features to look for include smartphone control, extended range, and two-way communication confirming successful start. Some systems allow programming for specific vehicle characteristics, addressing the extra time needed for the shut-off procedure. However, thorough research is crucial, as not all aftermarket kits are designed or suitable for manual vehicles. Professional installation is paramount to ensure safe and reliable operation.
Professional Installation vs. DIY
While DIY remote start installation kits are available, attempting this on a manual transmission vehicle is strongly discouraged without significant automotive electrical experience. The complexities surrounding the clutch safety switch, neutral position verification, and parking brake integration demand precise wiring and programming. Incorrect installation can create hazardous conditions, including unintended vehicle movement.
Professional installers specializing in remote starts understand the nuances of manual transmissions and can implement safety measures to mitigate risks. They are also aware of potential liability issues and can ensure the system functions correctly and safely. Though more expensive, professional installation provides peace of mind and avoids potential damage to your vehicle’s electrical system, or worse, a dangerous malfunction.
Dealer Policies: Why Many Dealers Avoid Installation
Many dealerships have a firm policy against installing remote starters in manual transmission vehicles, primarily due to significant liability concerns. The potential for a vehicle to start in gear and cause property damage or personal injury is a major deterrent. As one dealer stated online, any manual transmission vehicle arriving with a pre-installed remote start will have it removed immediately.
This cautious approach stems from the necessity of bypassing the clutch safety switch, a modification that introduces inherent risk. Dealers prioritize minimizing legal exposure and protecting their reputation. Offering such installations could open them up to substantial lawsuits in the event of an accident. Consequently, they generally avoid offering this service, even if a compatible system exists.
Removal of Existing Remote Starts on Manuals
A common practice among dealerships is the immediate removal of any remote start system found pre-installed on a manual transmission vehicle upon arrival. This proactive measure is directly linked to the substantial liability risks associated with these systems in manual cars. Dealers prioritize avoiding potential legal complications and safeguarding themselves from claims arising from unintended vehicle movement.
The decision to remove existing systems isn’t taken lightly, but it’s considered a necessary precaution. It’s a clear indication of the industry’s overall reluctance to support or endorse remote starts on manuals. This policy reflects a commitment to safety and a desire to avoid the potential for catastrophic accidents stemming from a vehicle starting in gear, as highlighted in online discussions.
Finding an Installer Willing to Take on the Job
Locating a qualified installer for a remote start on a manual transmission vehicle can prove challenging due to the inherent liability concerns. Many professional installers actively avoid these installations, fearing potential legal repercussions if the system malfunctions and causes an accident. Expect to encounter resistance and require extensive searching.
Online forums suggest that persistence is key. You may need to contact numerous shops and specifically inquire if they have experience with manual transmission remote starts, acknowledging the associated risks and your understanding of the required safety procedures. Smaller, independent shops might be more receptive than larger chains bound by stricter corporate policies. Be prepared to sign waivers acknowledging the risks.
Long-Term Reliability and Potential Issues
While a properly installed remote start on a manual transmission can function reliably, potential long-term issues warrant consideration. Frequent use of the system, particularly the adjusted shut-off procedure requiring an extra 20-30 seconds, could potentially strain components over time. The bypass of the clutch safety switch, while necessary, introduces a point of potential failure, demanding high-quality wiring and connections.
Regular inspection of the system’s wiring and connections is crucial. Monitor for any unusual behavior, such as difficulty starting or unexpected system activations. The added complexity compared to a standard automatic transmission installation may lead to increased maintenance needs and a higher probability of requiring professional diagnostics in the future.
Impact on Vehicle Warranty
Installing a remote starter on a manual transmission vehicle can potentially impact your factory warranty, particularly if the installation isn’t performed by an authorized dealer. Modifications to the vehicle’s electrical system, such as bypassing the clutch safety switch, are often cited as reasons for voiding related warranties.
Manufacturers may argue that the aftermarket modification caused a subsequent failure, even if unrelated to the remote start system directly. Dealers are often hesitant to install these systems precisely because of warranty concerns. Carefully review your vehicle’s warranty documentation and consider the potential risks before proceeding. Documenting the installation with a reputable professional and using high-quality components may help mitigate potential warranty disputes.
Maintenance Considerations
Remote start systems, especially those installed on manual transmission vehicles, require periodic checks to ensure continued safe and reliable operation. Regularly inspect the system’s wiring for any signs of damage or corrosion, particularly connections related to the bypassed clutch safety switch.
Ensure the parking brake continues to function flawlessly, as it’s a critical safety component in the remote start sequence. Be mindful of the added shut-off procedure time – approximately 20-30 seconds – and factor this into your routine. Consider professional system diagnostics every few years to identify potential issues before they escalate. Proper maintenance minimizes the risk of unintended vehicle movement and maximizes the longevity of the remote start system.
Cost Analysis: Installation and System Pricing
The cost of installing a remote starter on a manual transmission vehicle varies significantly, largely due to the complexity and liability concerns. Basic remote start systems can range from $150 to $400 for the unit itself, but manual transmission installations typically incur higher labor costs. Expect installation fees between $200 and $500, potentially more if specialized wiring or bypass modules are needed.
Compustar systems, known for manual compatibility, may be pricier upfront. Factor in potential hidden costs like additional relays, diagnostic tools, or professional programming. Dealer installations are often avoided, increasing the reliance on specialized aftermarket installers who may charge a premium. DIY installation is risky and generally not recommended due to safety implications and potential warranty voids.
Comparing Different Remote Start System Brands
When considering brands for manual transmission remote starts, Compustar consistently emerges as a leading option, specifically acknowledging and addressing the unique challenges. Their systems often require a specific procedure – neutral position and parking brake engagement – but offer a viable solution. Viper, while popular, generally presents more difficulties and requires more extensive bypassing of safety features.
Other brands may offer compatibility, but often lack dedicated support for manual transmissions, increasing installation complexity and potential risks. Researching specific models within each brand is crucial, focusing on features like two-way communication and smartphone integration. Prioritize brands with a proven track record and installers experienced with manual transmission vehicles to ensure a safe and reliable installation.
Hidden Costs to Consider
Beyond the initial price of the remote start system and installation, several hidden costs can significantly inflate the overall expense. Expect potential charges for specialized labor, as manual transmission installations demand more expertise and time. The necessity of a clutch safety switch bypass, while sometimes feasible, may incur additional fees due to the liability concerns for installers.
Furthermore, consider the potential for adjustments to the vehicle’s shut-off procedure, adding 20-30 seconds to the remote start cycle. Diagnostic fees may arise if the system interacts unexpectedly with the vehicle’s existing electronics. Finally, factor in potential increases to your insurance premiums, as modifications can sometimes impact coverage. Thoroughly discuss all potential costs with your installer upfront.